Probax Hive is designed to alert MSPs of threats to data integrity and availability. There is a growing concern within the IT Industry of targeted attacks, including ransomware, malicious personnel and hacking attempts.![]()
Due to the growing threat of targeted attacks, MSPs need to be vigilant towards any disruptions to their data availability & redundancy, including data that was once backed up that is no longer configured to do so, and data that was once backed up that is completely missing.
Probax provides advanced reporting functionality to combat this.
The following article aims to assist you in managing how you would like your data to be monitored within Hive. Additionally, Hive has integrated alerting capabilities that allow you to fully customise and prioritise the resources you need.
Alerting
Hive alerting is designed to ensure that you, the MSP, can at any time be aware of any changes to the data being backed up to the cloud for any of your customer accounts. In Hive, alerting can be managed in two ways:
- MSP Alerting: Wherein alerting can be edited for all Customer accounts, determining the output of MSP reports to be created
- Customer Account Alerting: Where individual backup items can be managed to raise alerts as you see fit.
1. MSP Alerting
MSP alerting allows you to manage the alerting for all the accounts in one convenient location, to the preferences you prefer.
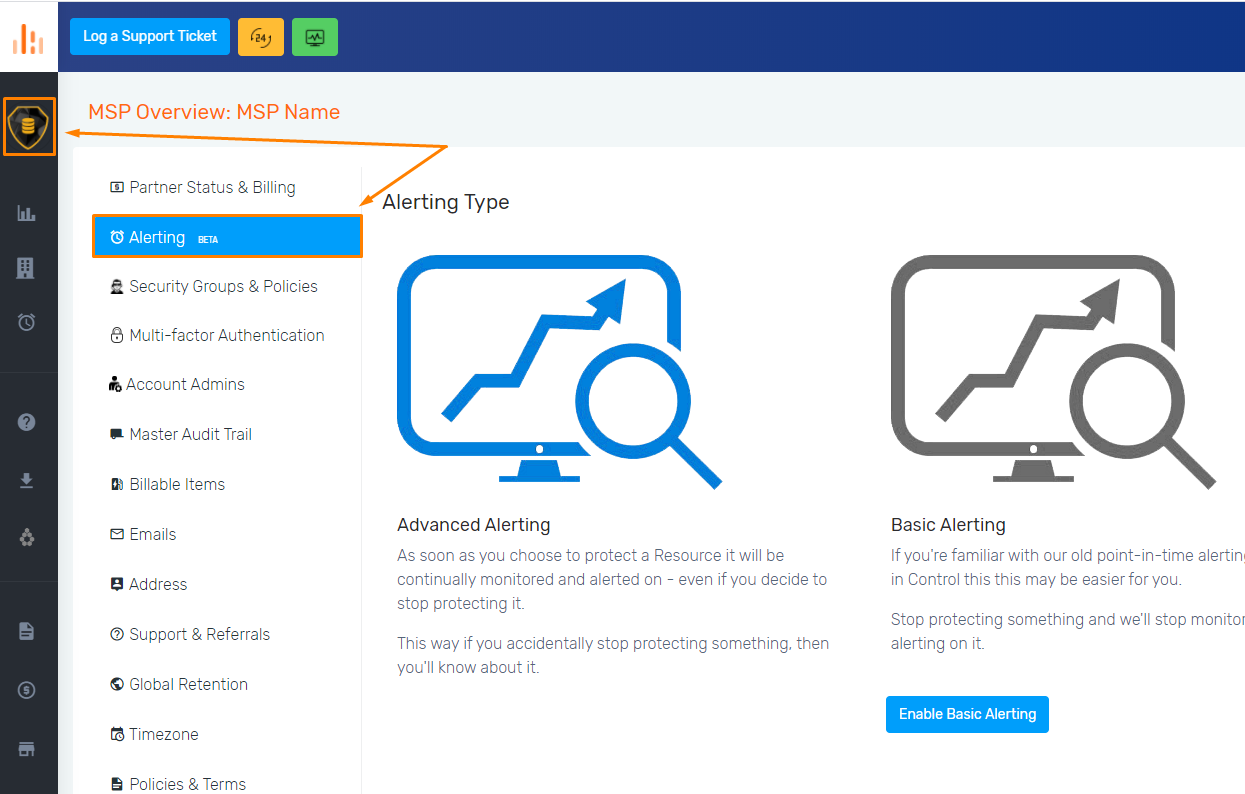
Simply head to your MSP:Overview page by selecting the coloured Hive icon at the top-left side of your window. Next, find the 'Alerting' tab from the list of options presented. Here, you can view the MSP alerting options that apply to all the customer accounts assigned to your MSP account.
By selecting Advanced Alerting, alerts will be presented to you via Hive, even in the case of removing protection from a resource's data. Further, alerts will be generated if a resource's data were to be removed, accidentally or otherwise.
Alternatively, selecting Basic Alerting will monitor your data as per usual, but resist alerting for a resource in Hive that is no longer being backed up to the cloud. Our long-term MSP's will remember this feature from Probax Control as point-in-time alerting.
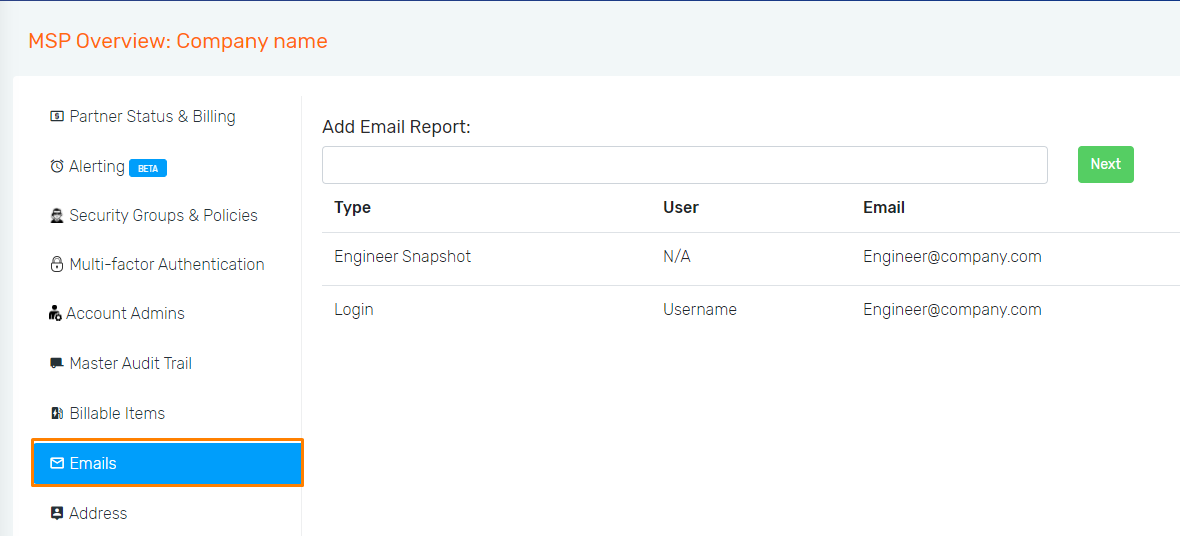
Feel free to double check your Email Reporting by heading to the "Emails" tab in this same section. Further, add other engineer's emails to the list to ensure your team is up-to-date on all alerts.
2. Customer Account Alerting
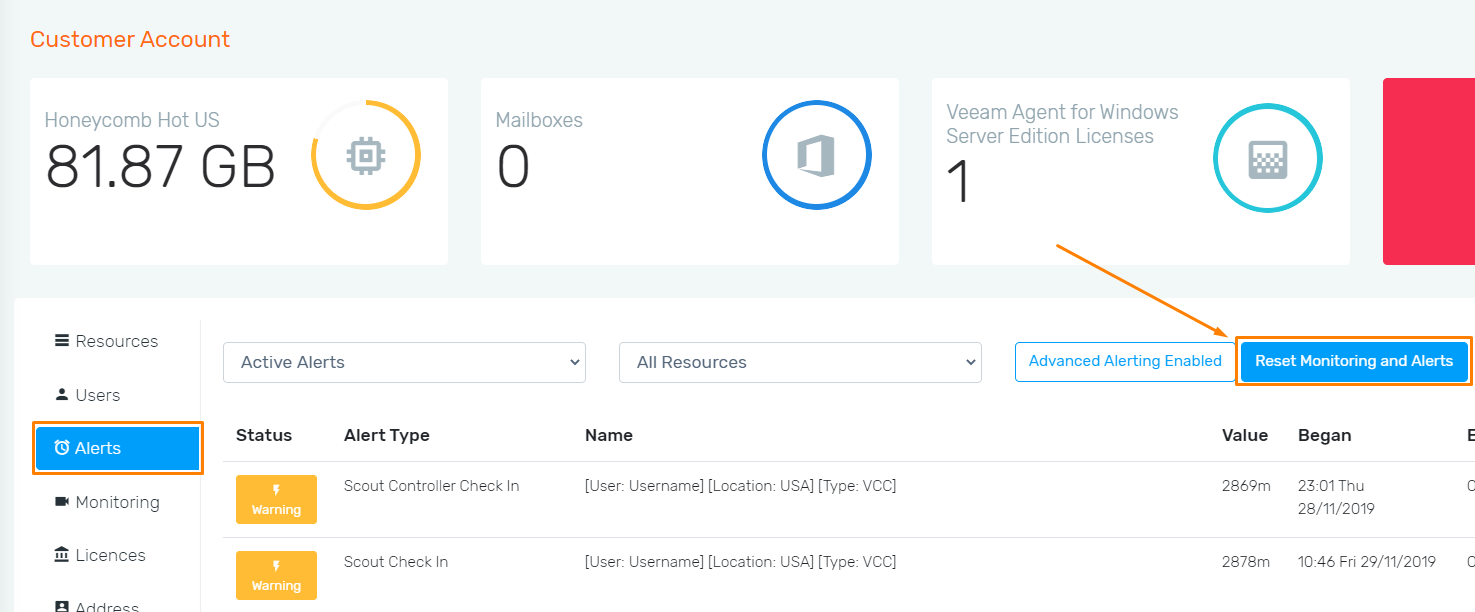
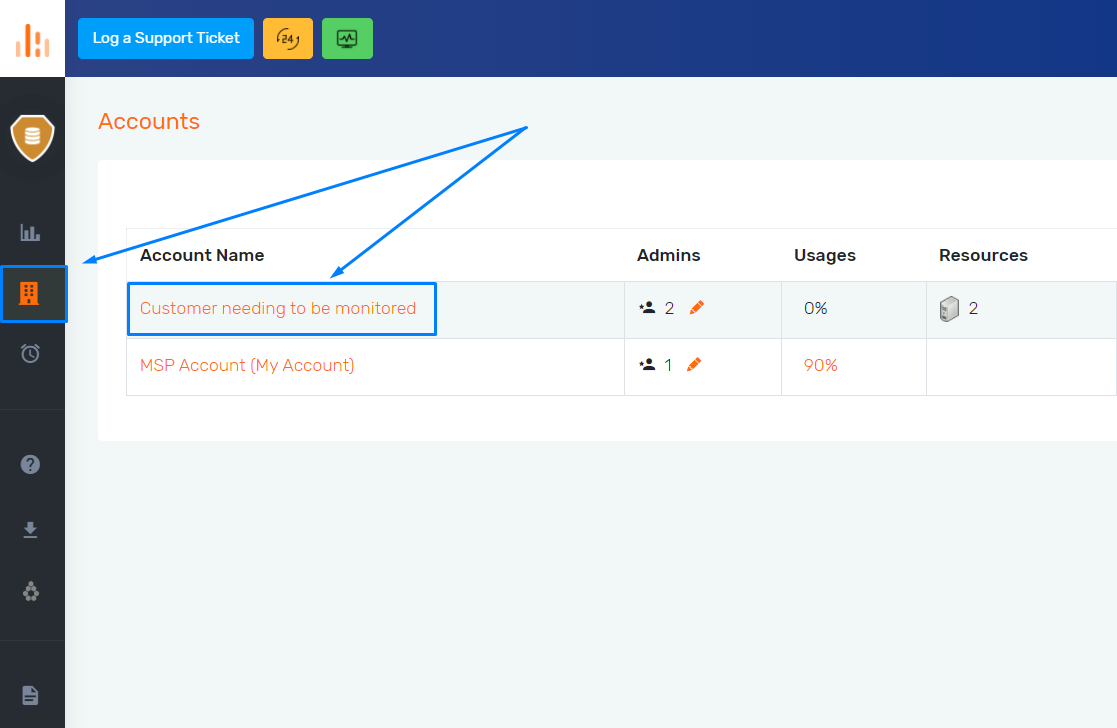
Managing alerts for a single Customer Account on Hive can be done in multiple locations within Hive. To view all the alerts associated with a single customer, head to the "Alerts" tab in Hive. Here, you can elect to view alerts for different time periods and different resources using the drop down menus.
Also, in this section, you have the option to "Reset Monitoring and Alerts" - great for cases where you have changed resources for the account, or re-configured backup jobs that may be triggering alerts within Hive.
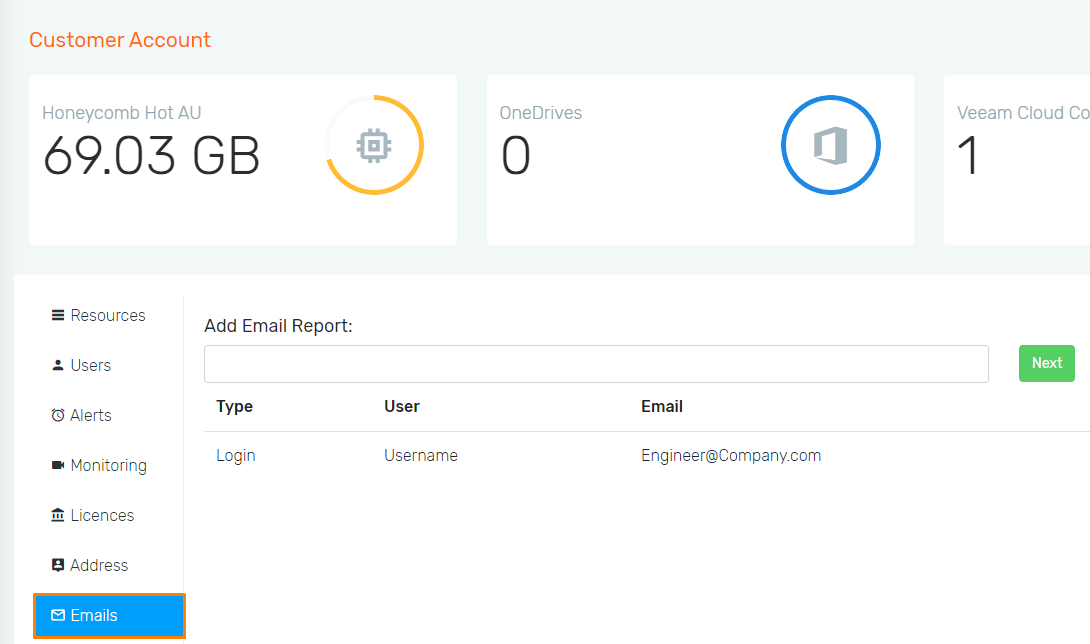
Feel free to double check your Email Reporting per Customer Account by heading to the "Emails" tab in this same section. Further, add other engineer's emails to the list to ensure your team is up-to-date on all alerts.
Monitoring in Hive
Whilst going hand-in-hand with alerting, the monitoring area of Hive allows full control and view of how Hive displays alerts for different resources. In this menu, you are able to navigate through the alerting for each Resource backup item - customising how Hive will alert you.
Changing monitoring per-alert:
Probax Hive allows you to change monitoring per individual data source at the alert-level, straight from the resource-view's 'Alerts' tab. This makes it easy for you to change
- Head into the customer account in Hive you wish to edit the monitoring for
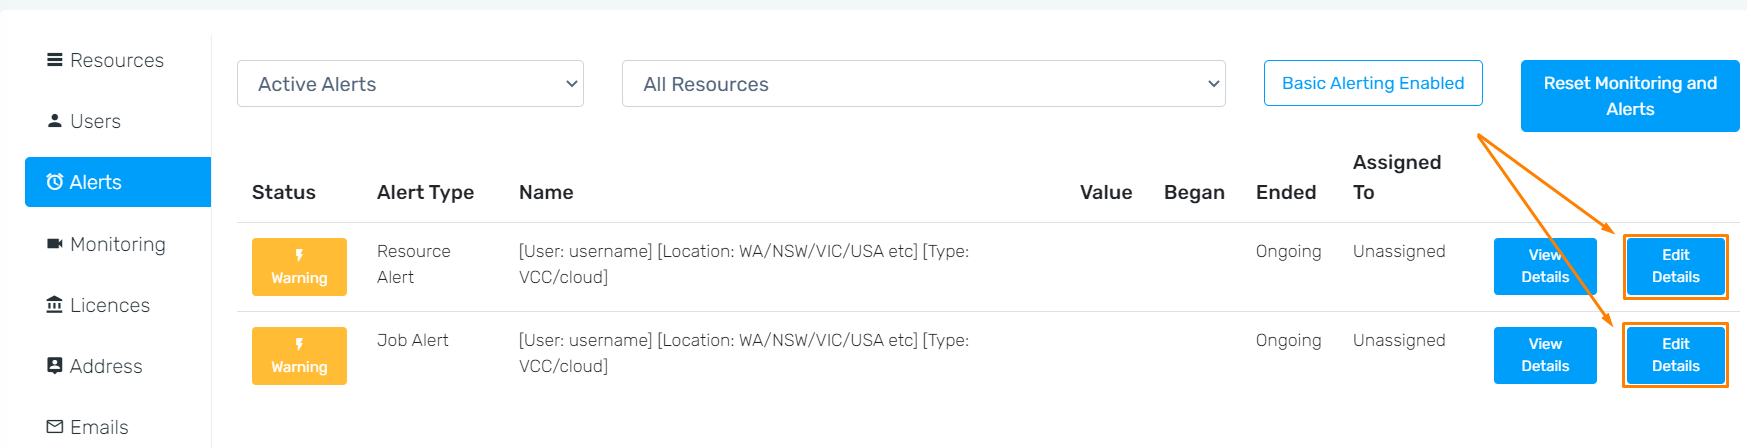
- Find the 'Alerts' tab on the left, and select the alert you'd like to change monitoring properties for
- Hit 'Edit Details' next to the alert, and chose how you would like that data source to be alerted on:
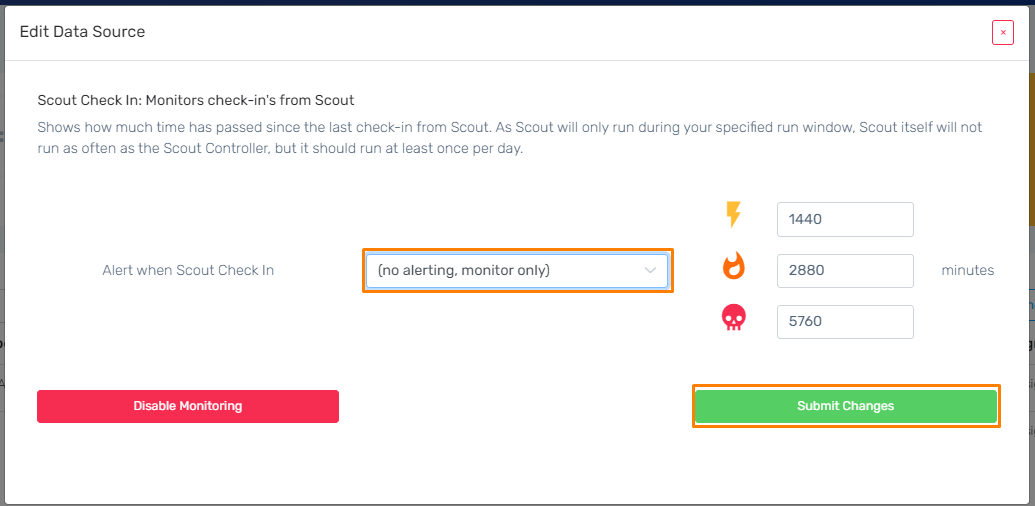
- To remove monitoring for that resource completely, select the 'No Alerting, Monitor only' option from the drop-down box and select 'Submit Changes'
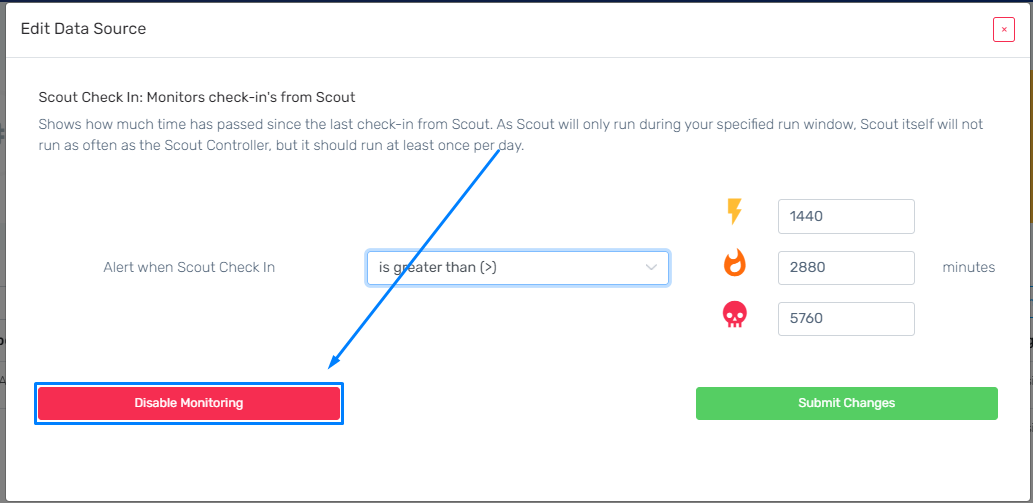
- To remove monitoring at this current time for this resource, hit the 'Disable Monitoring' button. Alerts will be re-raised if the alerted data-source is found once again.
Changing monitoring properties for resources:
- Head into Hive and select the customer account you wish to change monitoring for:
- Navigate to the "Monitoring" tab on the left-hand side of the Customer Account
- Review the drop-down boxes, selecting first the Resource that you would like to change monitoring for
- Once you have selected the Resource you would like from the larger drop down box, navigate through the remaining drop down boxes to access individual items/alerts.

- With your backup item/alert found, hit "Edit Details" to bring up the "Edit Data Source" menu.
- In here, you are able to change how Hive alerts you based on the backup item selected in the previous steps. Simply navigate through the options in the drop down box, and hit "Submit Changes" to confirm these changes.
- Alternatively, you can elect to simple "Disable Monitoring", which will remove the monitoring history of Hive (for the item selected) up to present. This is especially handy when clearing out 'old' alerts that may remain after changing backup resources in a Customer Account within Hive.