At Probax, we understand that nothing is more important than secure data. To maximise security for your MSP, Hive makes Multi-Factor authentication setup easy and secure, ensuring peace of mind for you and your customers. Chose between managing MFA for each Hive user on the account level (including, SMS Two-Factor authentication) OR managing MFA on the MSP level.
Authenticating with MFA will be required whenever a user changes location or hasn't logged in for 24 hours. We strongly advise setting up MFA on all users as soon as possible, with Google Authenticator preferred.
Setting up MFA for your Users
When you create users to manage your customer accounts on Hive, MFA can be enforced on those users to maximise security for their logins, keeping access to your data protection secure. Setting up MFA for your account users is simple to do in Hive, and can be done via Google Authenticator app or SMS verification.
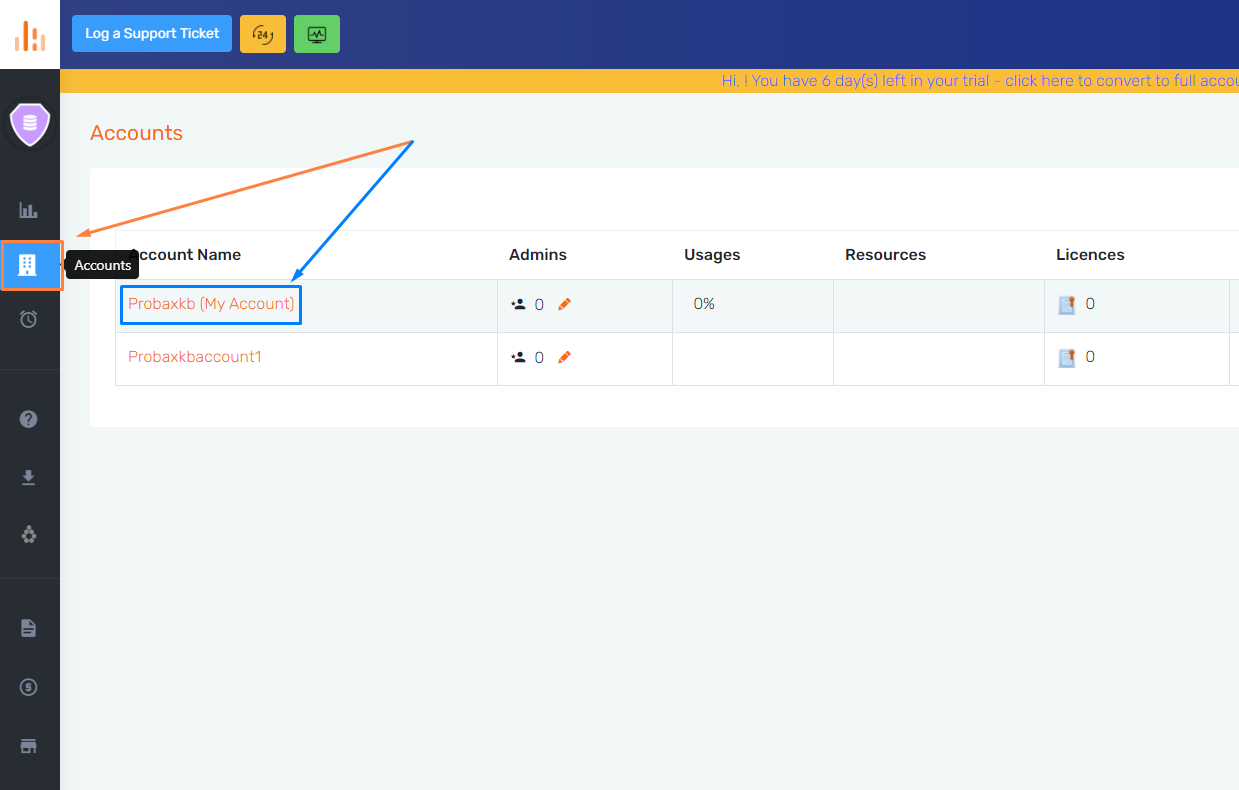
- Login to Hive with your credentials, and select the 'accounts' icon in the top left
- Select the (My Account) internal account for your MSP
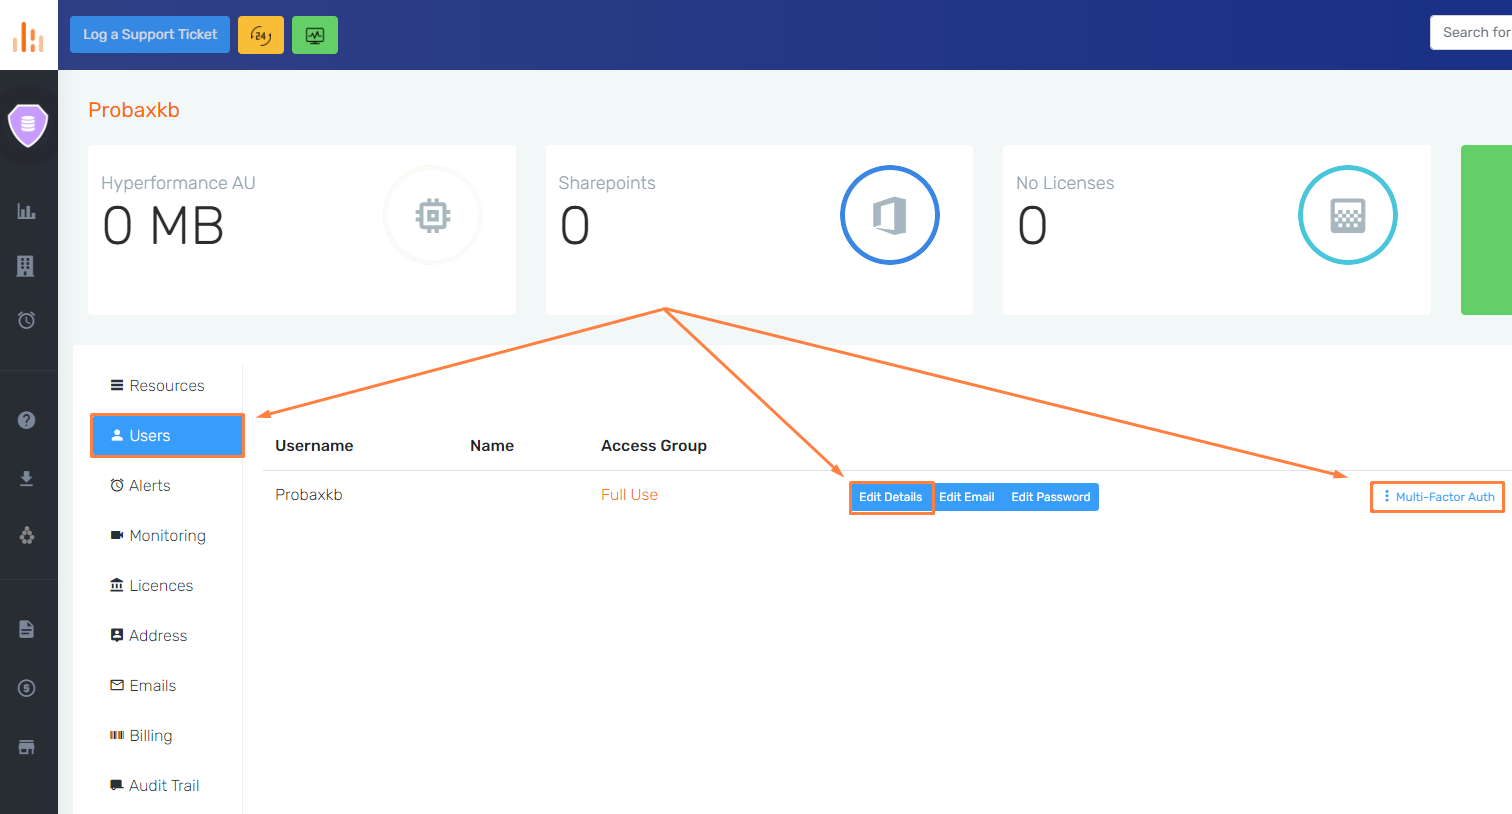
- Head to the "Users" tab on the left-hand side
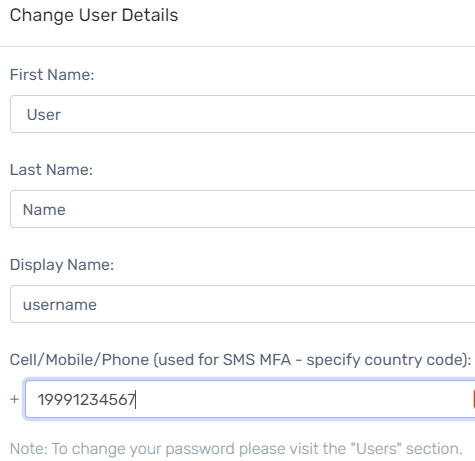
NOTE: If this is your first time enabling SMS-MFA, be sure to select 'Edit Details' next to the user in question and enter a mobile number for SMS Authentication. The number should include the Country code with no spaces.
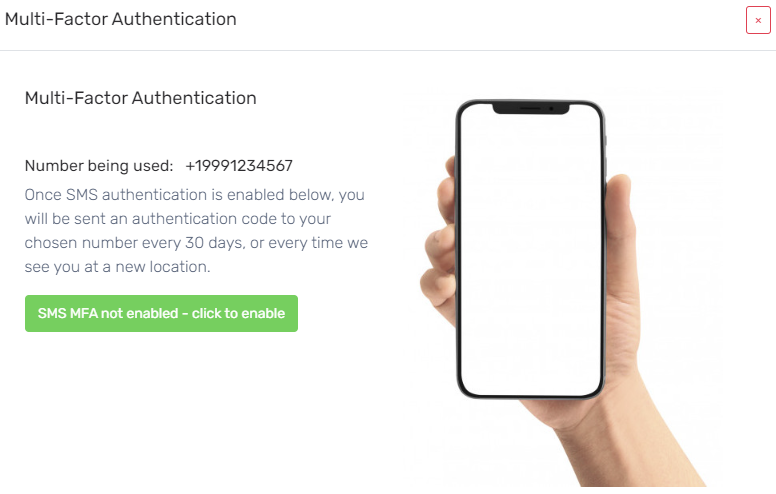
- Access the "Multi-Factor Auth" button, ensuring to select the way you would like this user to authenticate their login details
Managing MFA for your MSP
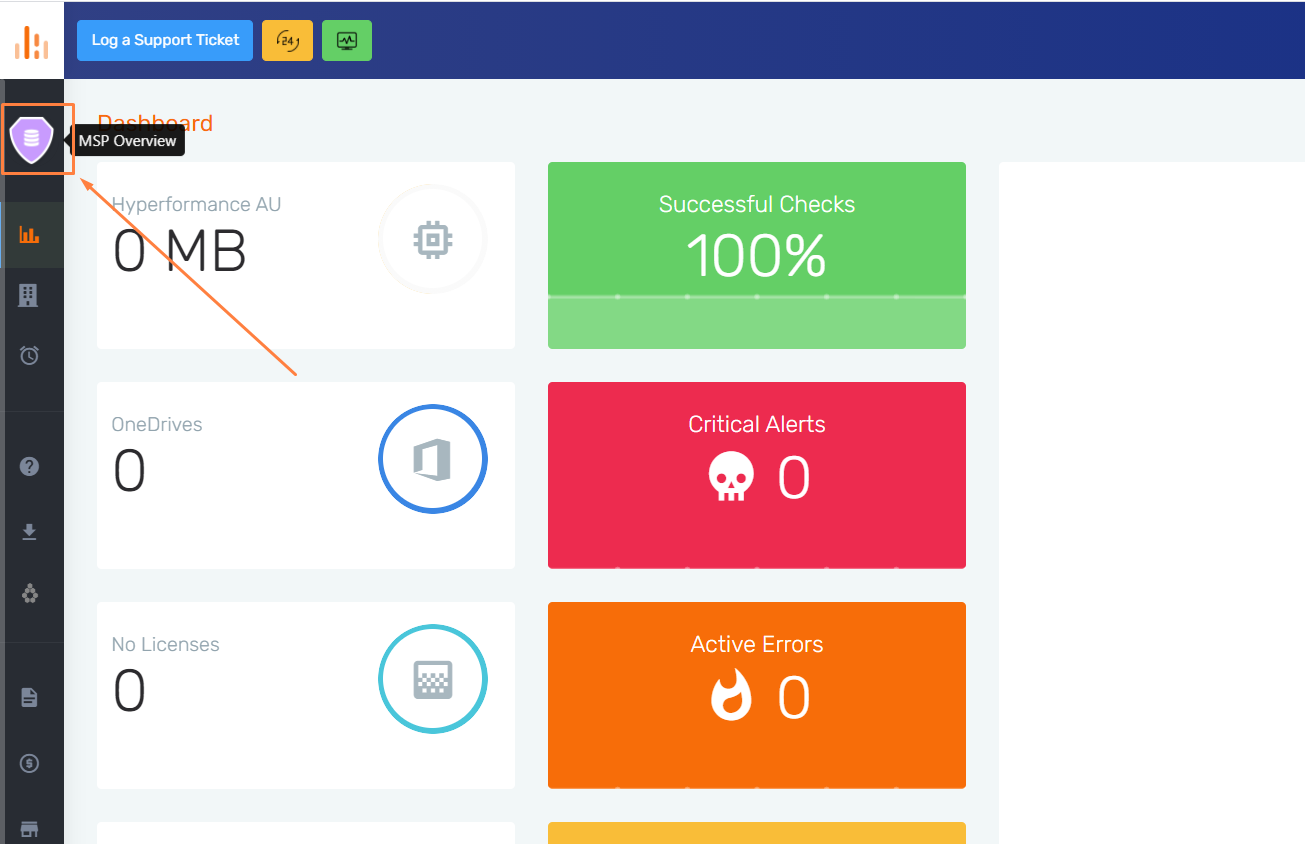
Whilst managing users for your MSP in Hive, it is important to enable MFA to ensure the upmost security is held for access to your data protection. To access MFA settings for your MSP users, head to the 'MSP Overview' area of Hive:
- Login to Hive, and select the 'shield' icon at the top left
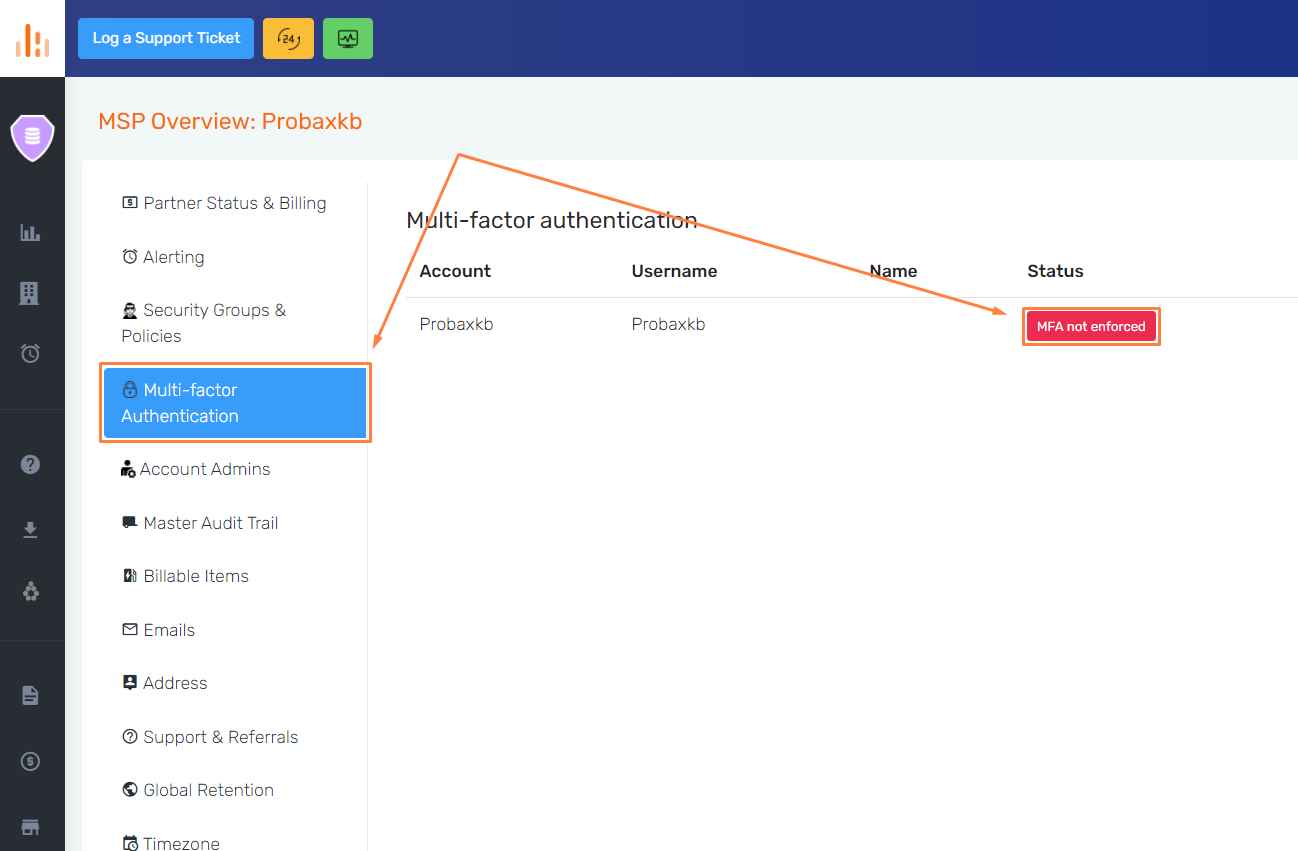
- In the following section, access "MFA Overview" via the list on the left-hand side and select "MFA not enforced"
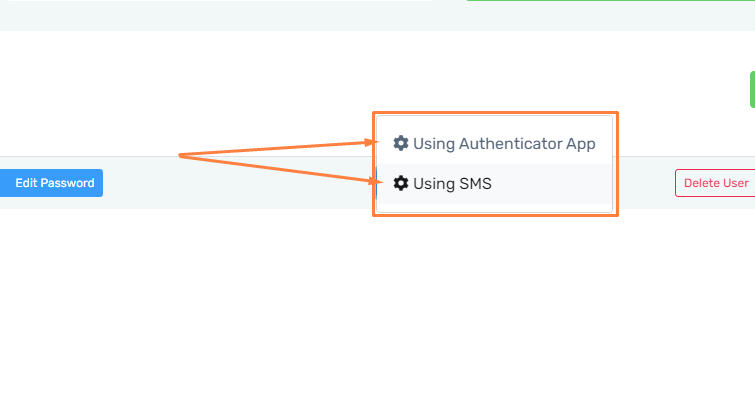
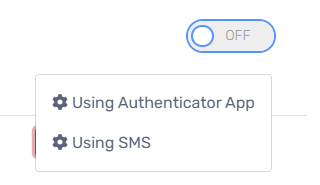
- Choose between using an Authenticator App or using SMS
- If you choose "Using SMS", click the Edit Details button next
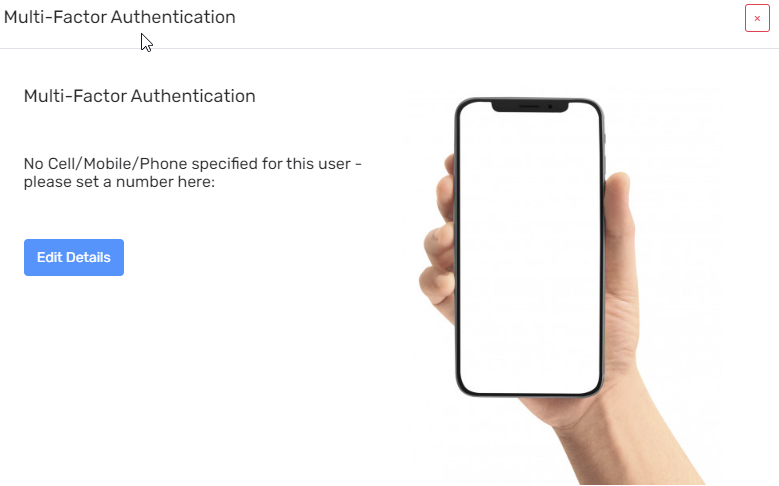
- Enter the User details. Ensure the phone number contains the country code, followed by the number with no spaces, and then click "Set User Details"
- Click "Multi-Factor Auth" again, choose "Using SMS" and then click to enable
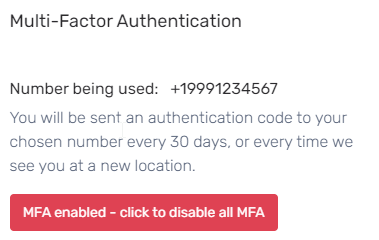
- You are then presented with a screen confirming MFA is enabled
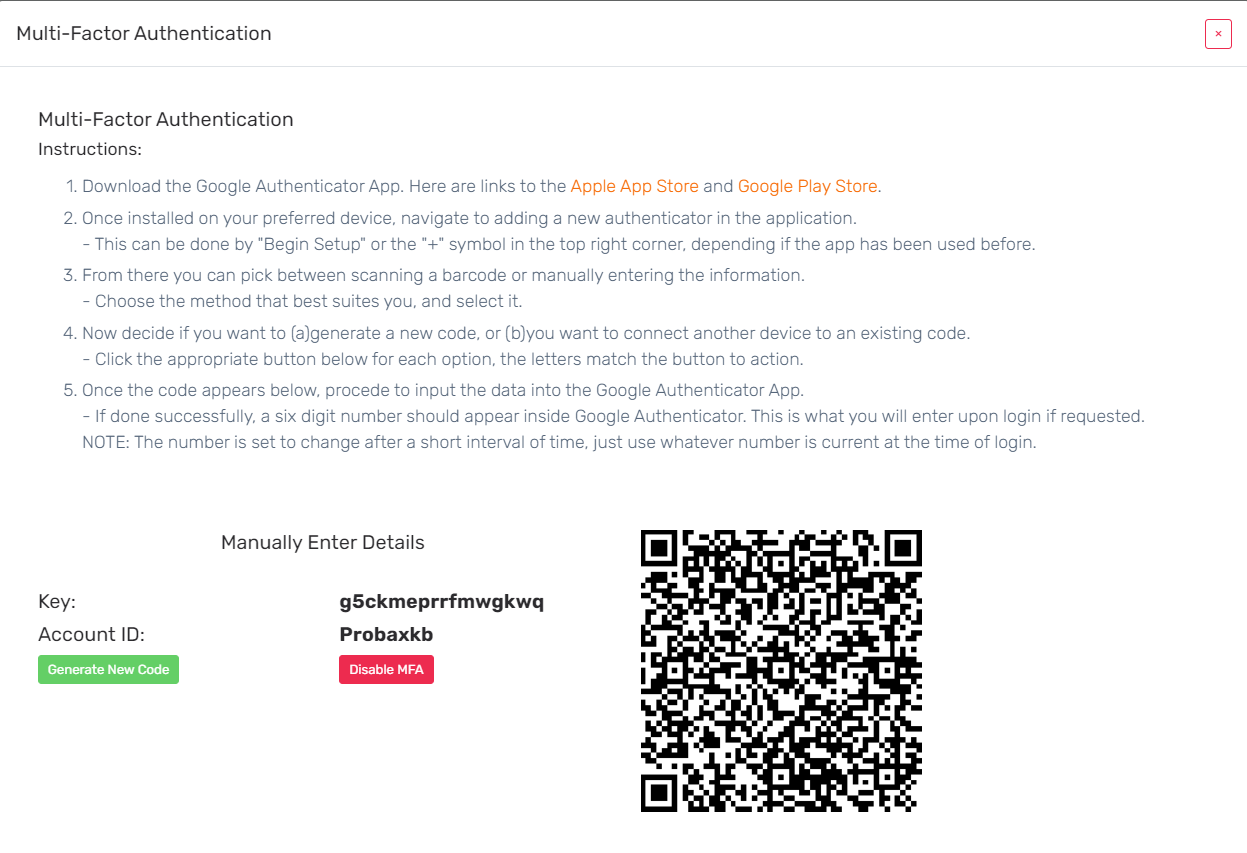
- If you choose "Using Authenticator App", read through the instructions carefully, and select "Generate New Code"
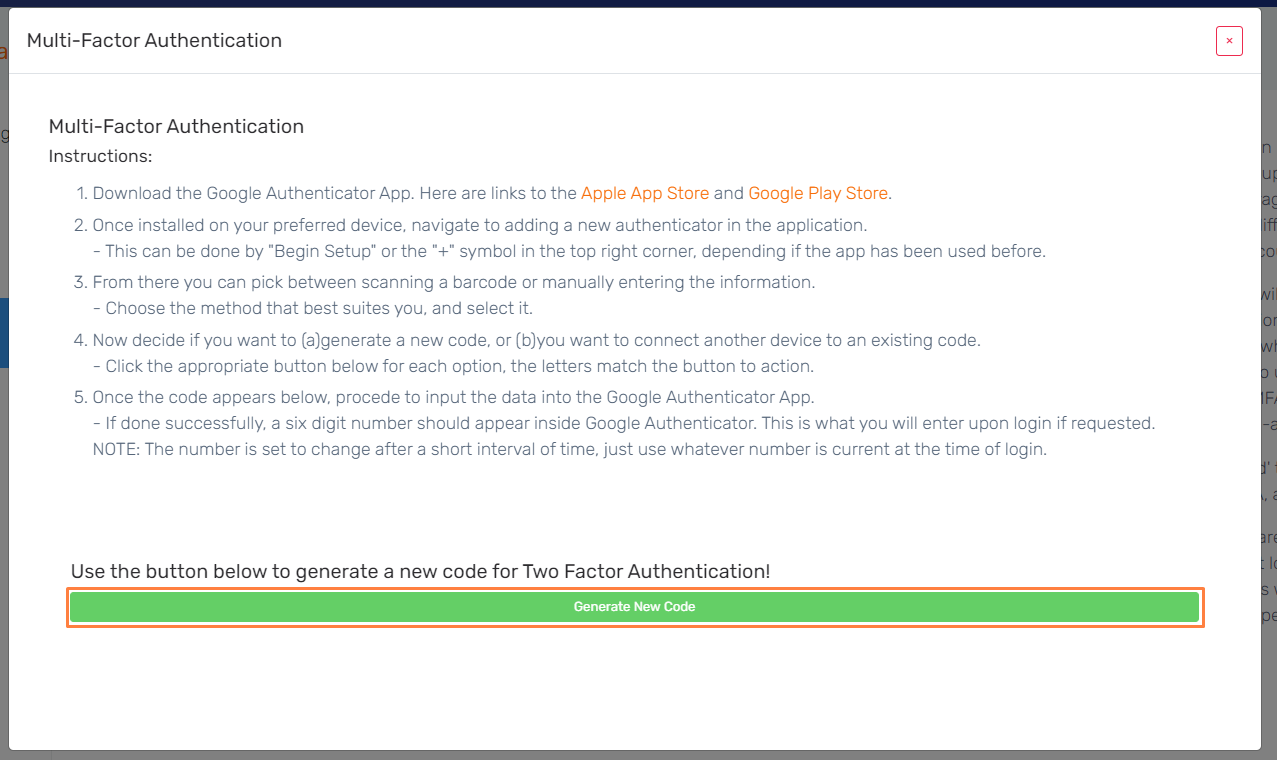
- Follow the instructions to set up MFA using your Google Authenticator app