Licensing and Limitations
Please review our Microsoft 365 Backup & Archive FAQ to understand how the solution works and correctly license the solution. Please note that failure to license the solution correctly is in breach of our Acceptable Use Policy.
App-only Authentication, whilst preferred, currently has small limitations that are due to be resolved in future iterations of Veeam. Please review the following KB article from Veeam before proceeding
ONBOARDING WITH APP-ONLY AUTHENTICATION
For this authentication, there are four main steps that must be followed for your backups to be accessible correctly in Hive.
Steps 2, 3 and 4 must be followed to ensure Hive is able to distinguish user-types (SharedMailbox, MailboxUser, etc) and license-types ("Business premium", "M365 Essentials", etc). This also allows for Hive's internal filtering of license types
-
Create a Global Admin user and onboard the app to Hive
-
Assign API Permissions to the user (NEW)
-
Assign Azure AD roles to the application (NEW)
-
Save App Secret and Tenant ID in Hive to enable license-type filtering
Getting onboarded with Modern authentication is simple and can be done directly in Hive through your customer account. For customers new to Hive, please visit our Create an Account KB to get started. Here's a quick demo, demonstrating the steps needed to onboard using Hive:
Create a Backup Service Admin User for Veeam
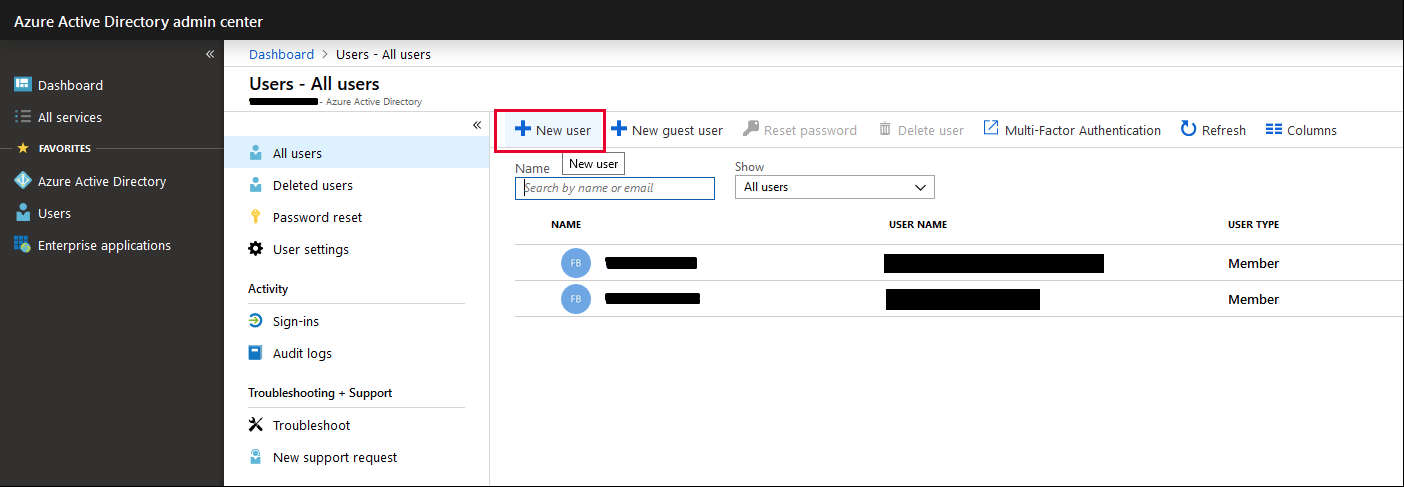
- Head to Azure Active Directory Admin Centre and login using your administrator account
- Create a new user to use as the Backup Service account:
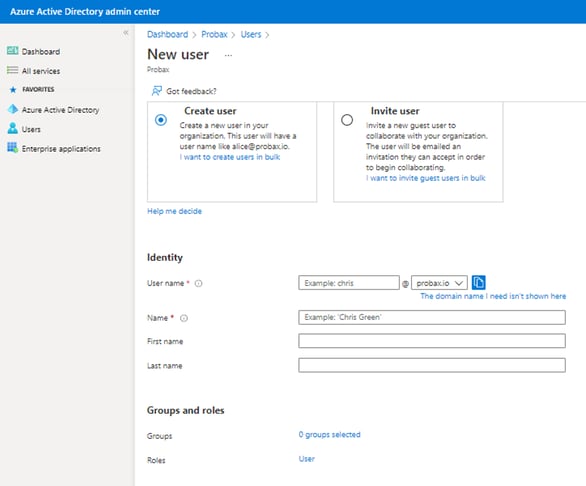
In the Azure Active directory admin centre dashboard, from the Users tab, select the All Users tab. Navigate to the "New user" button, and click it to generate a new user form.
In this area, please:- Assign a username for the Backup Service Admin account (probaxbackup or similar is fine)
- Assign a name for the user
- Leave the First name, Last name and Groups fields unchanged
- Next to 'Roles', select designate Global Administrator under Directory role. This will ensure you can continue with the setup process.
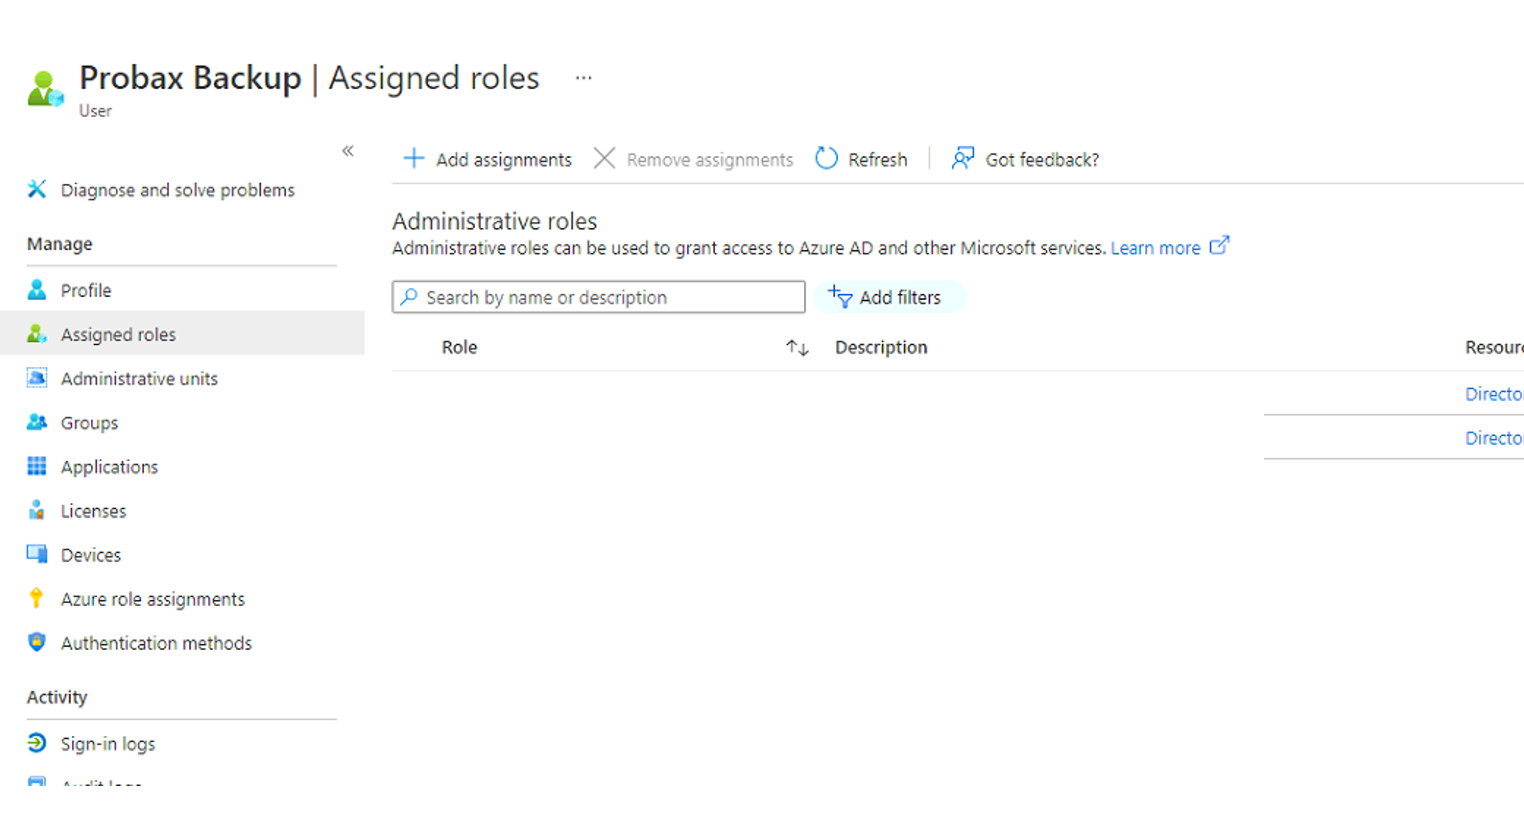
- Once confirmed, check your Global Administrator role has been added correctly by heading to the 'Assigned roles' tab (occasionally, roles won't assign properly during the user creation step). Hit 'Add assignments' if you do not see the Global Administrator role in this area
- Next, we'll link your M365 organisation to Hive using the customer account you created in step 1.
-
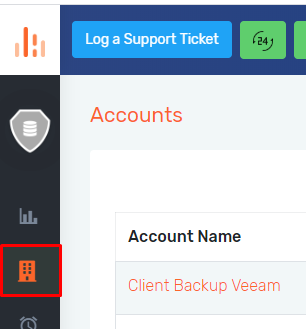
- Log into Probax Hive.
- Within the left-hand panel, select the Accounts tab and navigate to the desired account.
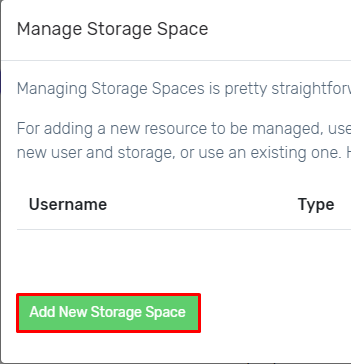
- Once you are in your Customer account, select the option "Manage Storage Spaces" at the upper-right corner of the window.

- Select the option Add New Storage Space.
- Chose the region you would like to connect to from the list
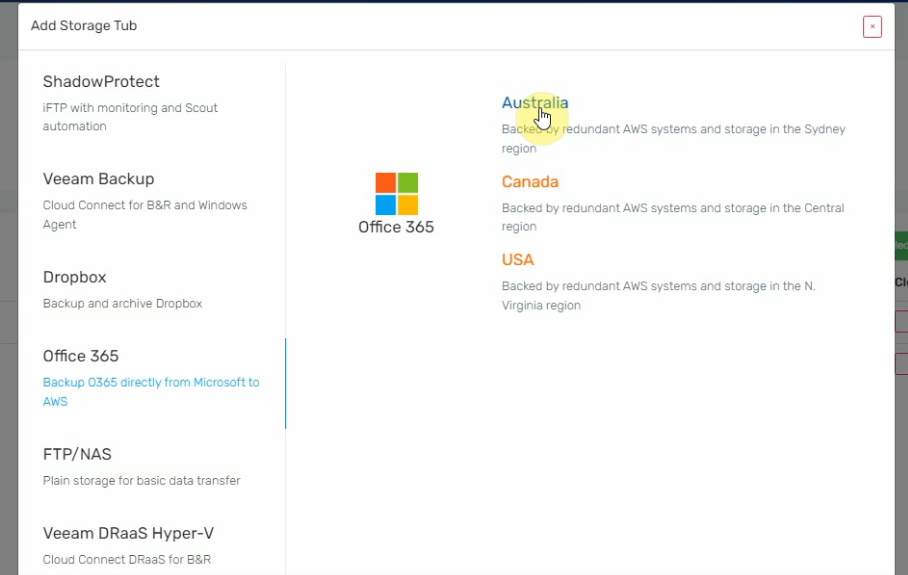
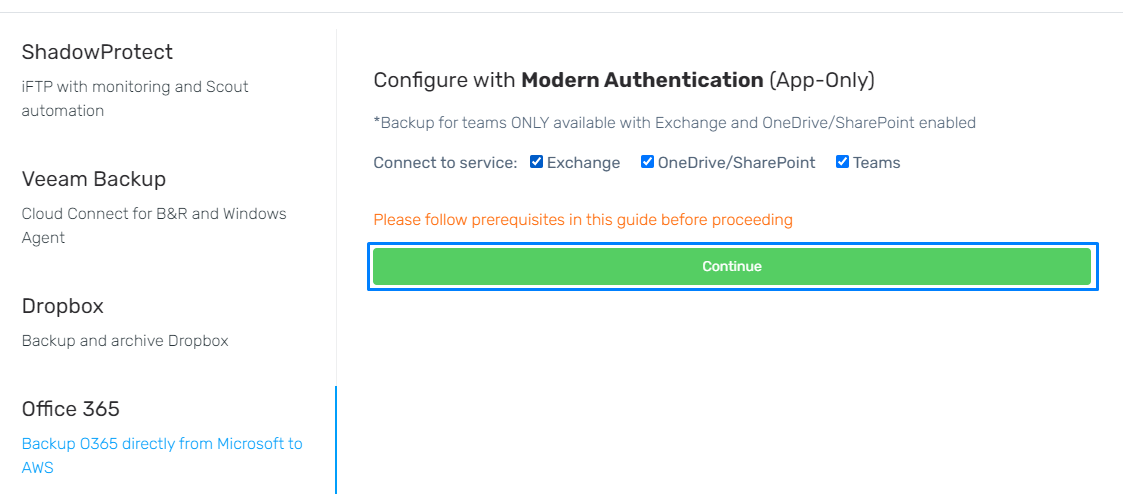
- Using the checkboxes here, select the services you would like to connect to... Hit continue once confirmed.
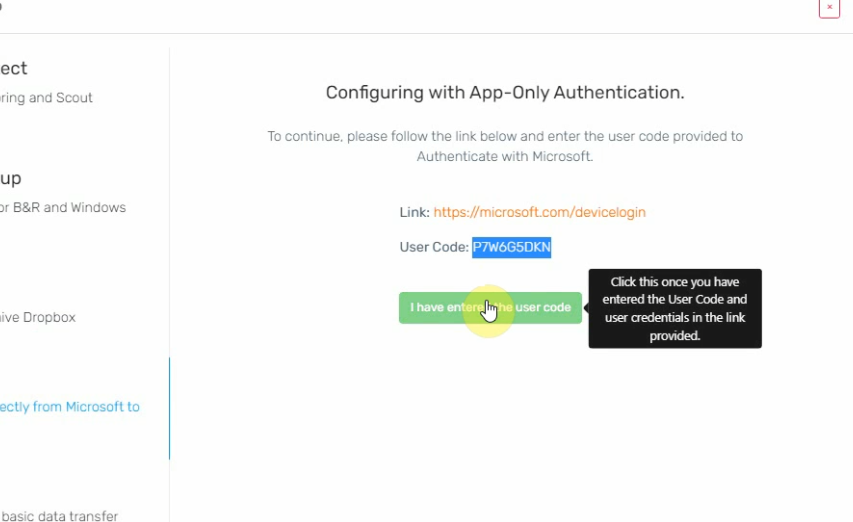
- In the next menu, copy the link on screen into a new incognito window, followed by the User Code.
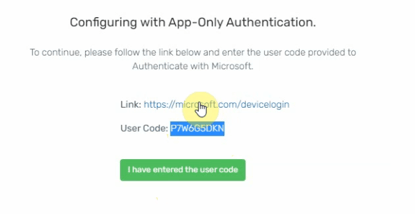
- In this newly created window, you will be prompted to enter in the User Code. Enter this in, and hit 'Next'

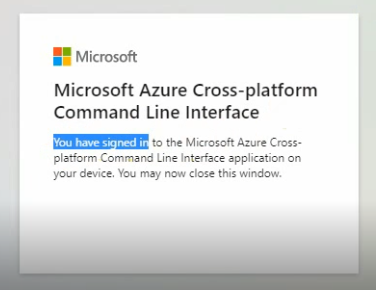
- Follow any of the prompts given, being sure to use the credentials for your newly created Global Administrator Backup Service Account. At the end of this process, confirm you can see the 'Cross-platform Command Line Interface' notice, and head back to your Hive window.
- Select the green button underneath your linking information, and wait for the Authentication process to complete
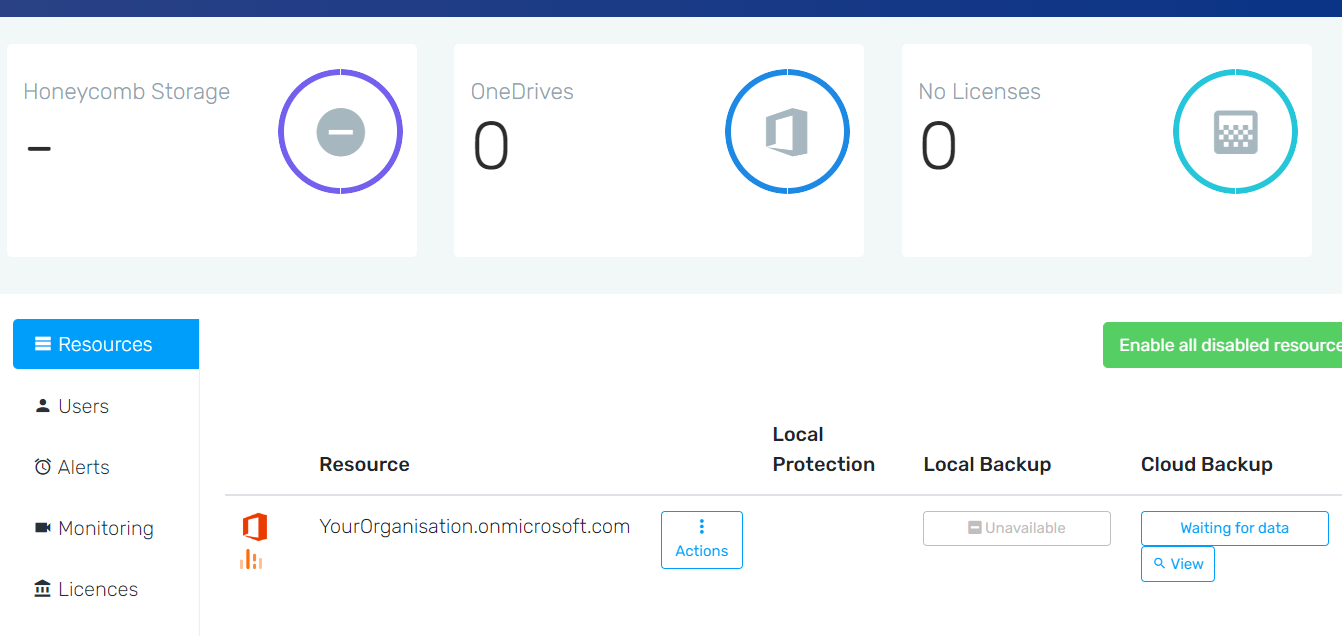
- The organisation will now process and be added to Hive. Please do not close the window until you have seen your organisation show up in Hive's resource view:
Assign API Permissions to the Application
The following is taken from Microsoft's documentation here, steps 2 and 5:
https://docs.microsoft.com/en-us/powershell/exchange/app-only-auth-powershell-v2?view=exchange-ps
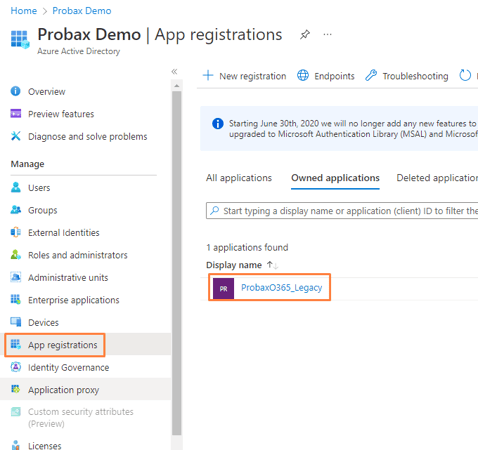
- Within the organisation's Azure Active Directory Admin Centre, find the 'App Registrations' area from the tool-bar on the left-hand side, under the 'Manage' field.

- Please select the App Registration that we just made from the 'All applications' tab (by default, Probax gives the app the name 'Probaxo365').
Organisations migrating from other authentication types will see their app named under the convention: 'ClientName_probax_o365backup_AO':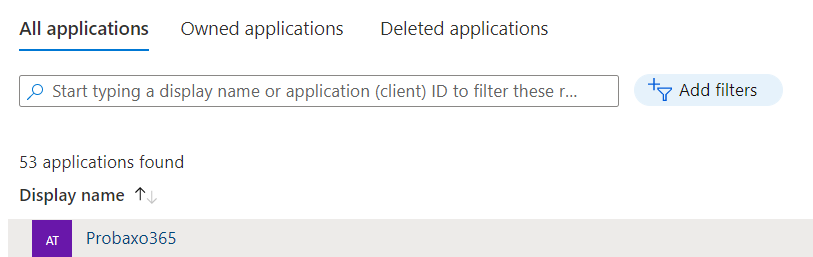
- Please select the App Registration that we just made from the 'All applications' tab (by default, Probax gives the app the name 'Probaxo365').
- From within the app's settings, select 'API Permissions', and click "Add a Permission".
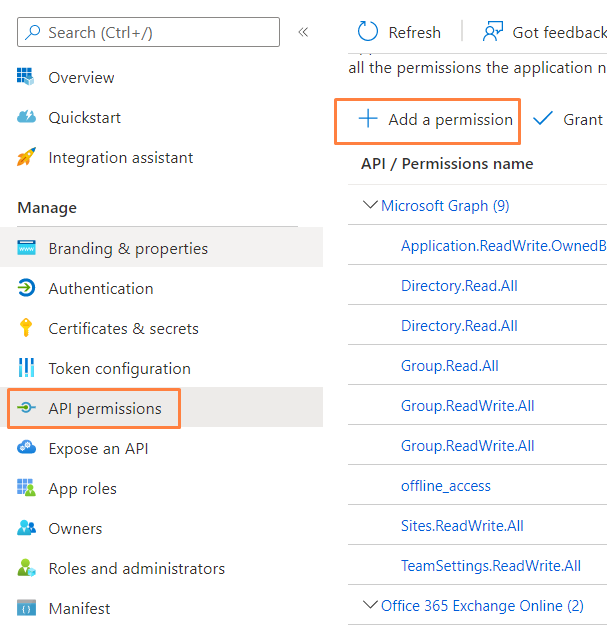
- On the pop-out window, navigate to the tab "APIs my organization uses".

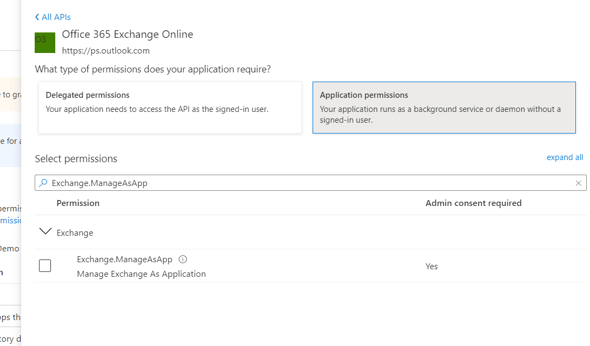
- Search for and select "Office 365 Exchange Online", and click "Application permissions".
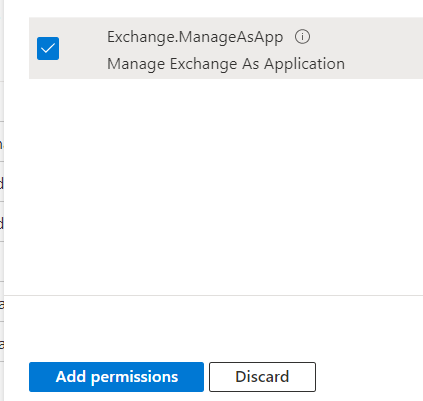
- Within the heading "Exchange", select the Exchange.ManageAsApp permission and click "Add permissions" at the bottom of the screen.
- Back in the API permissions menu, next to that permission's name, we need to check if admin consent has been granted (Microsoft's example organisation here does not have this granted):

If this has not been granted, click the 'Grant admin consent' button, and hit 'yes' at the prompt- Verify everything is A-OK:

- Verify everything is A-OK:
Assign Azure AD Roles to the Application
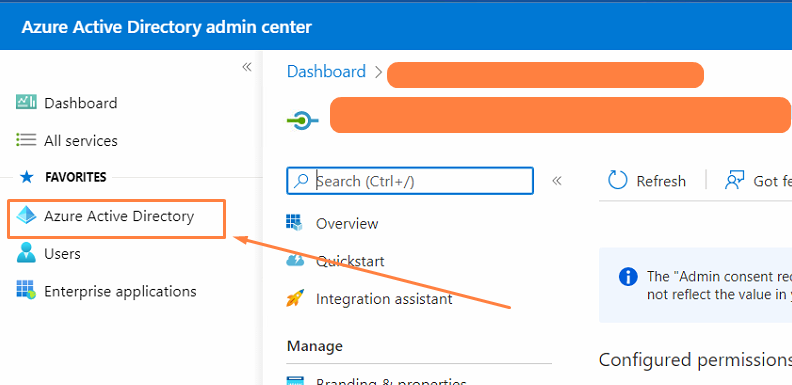
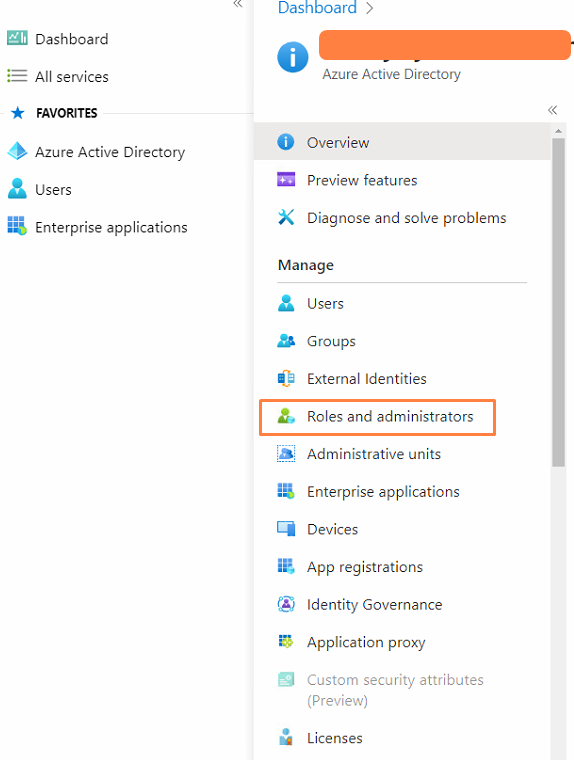
- Start by accessing the Azure Active Directory landing page, by hitting the 'Azure Active Directory' link in the top-left of your portal.
- Find the 'Roles and administrators' button on the left-hand side, under the 'Manage' tool-bar:
- In the search bar under 'Administrative roles', search for the "Exchange administrator" role to use to assign the M365 app to. This can also be applied to 'Global reader' or 'Global Administrator' roles too.
Click on the role you searched to access it's properties: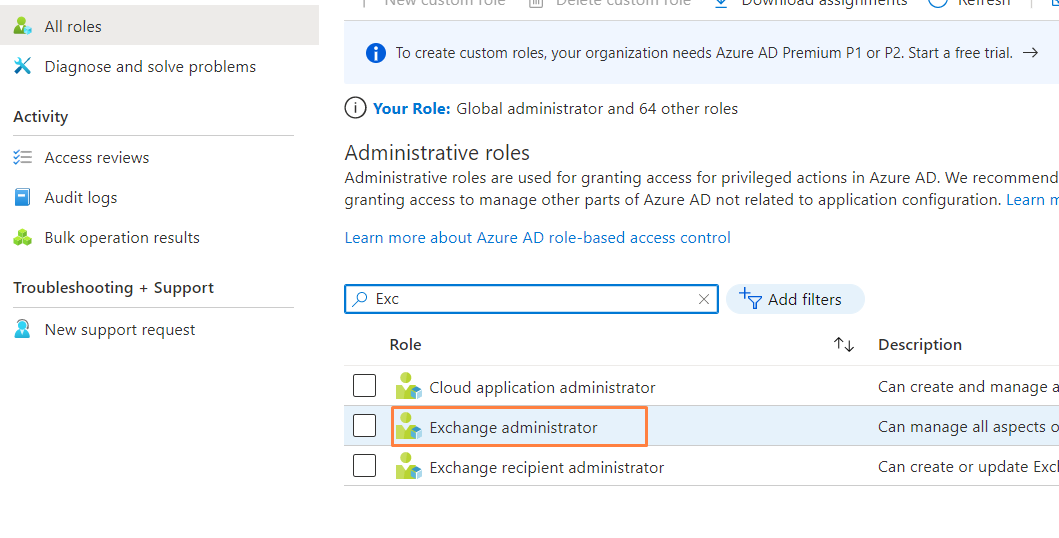
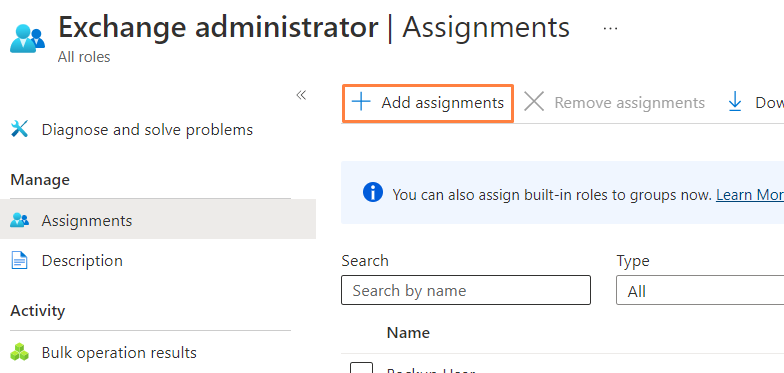
- On the left, be sure to be on the 'Assignments' sub-tab, and hit 'Add assignments':
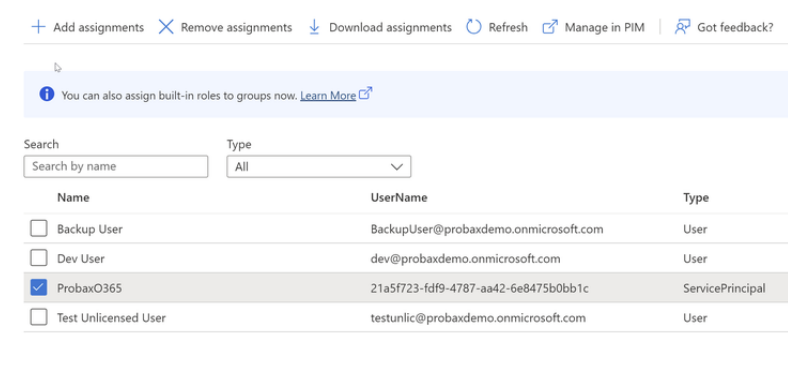
- In the Add assignments flyout that opens, find and select the app that was created for your Veeam M365 backups (the name of the app is the same as that of step 1, Assign API Permissions to the Application that we completed above), and select 'Add' to confirm.
By default, Probax gives the app the name 'Probaxo365' -
Organisations migrating from other authentication types will see their app named under the convention: 'ClientName_probax_o365backup_AO':
- Verify you can see the app-name in the list below:
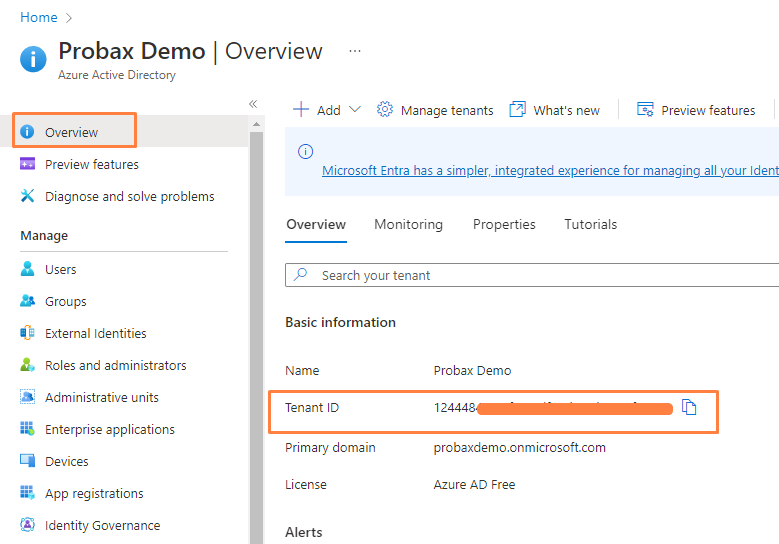
Adding your Azure Tenant ID and Secret Value to Hive to filter/backup by license type
Probax are able to pull extra information into Probax Hive relating to license-types and filtering using an organisation's Application secret, as well as their tenant ID. Both these are easy to attain from the organisation's Azure AD portal.
- Log into to your Azure Active Directory Admin Centre, and find the Tenant ID under the 'Basic information' heading in your organisation's 'Overview'. Take note of this, as we'll need it for a later step.
- For the Application secret, this can be easily created in the app's settings, as we did before:
- Navigate down the page to 'App registrations' area and into the Application we created in previous steps (remembering the name of your app from previous steps) - This may appear under 'All applications'
- Navigate down the page to 'App registrations' area and into the Application we created in previous steps (remembering the name of your app from previous steps) - This may appear under 'All applications'
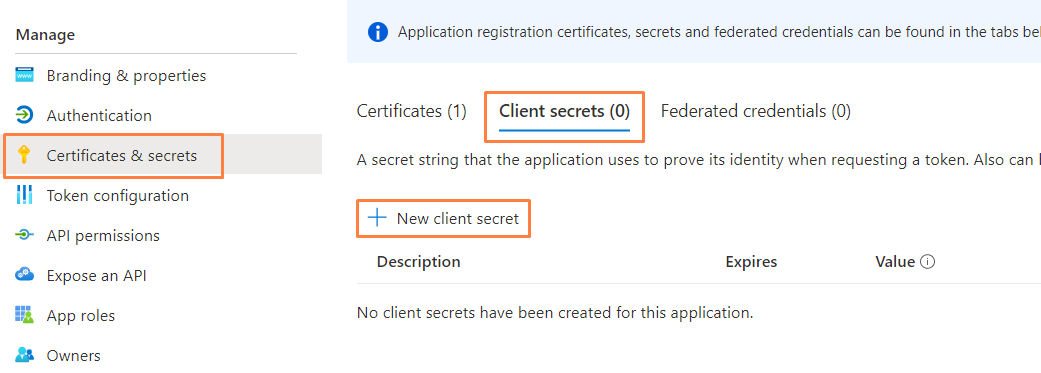
- Click the 'Certificates & secrets' heading, and follow the steps to create a new secret:
- Navigate to the client Secrets tab followed by + New client secret.
- Insert the desired description and select an expiry date (24 months is always recommended) within the wizard, then select Add.
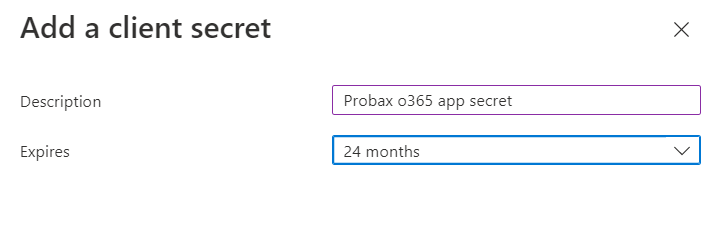

- Take note of the SECRET VALUE that appears - This will only be available once. . Please note, there is also an ID reference that will appear beside the Value output, which is not required.

- Navigate to the client Secrets tab followed by + New client secret.
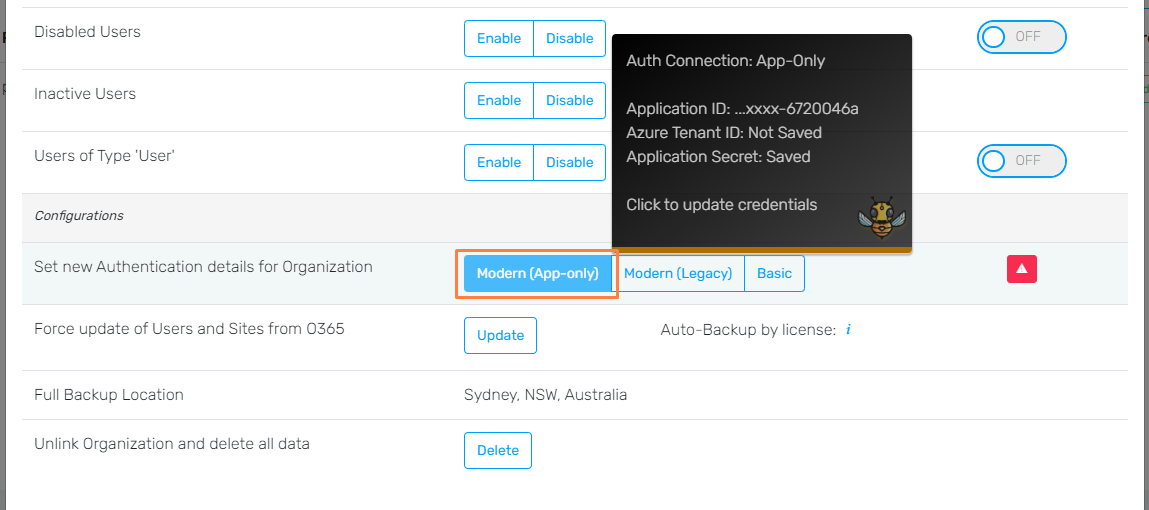
- Head over to hive.probax.io, and jump into the customer's account to view your newly made M365 resource. Select 'Configure Protection' to bring up the organization's settings

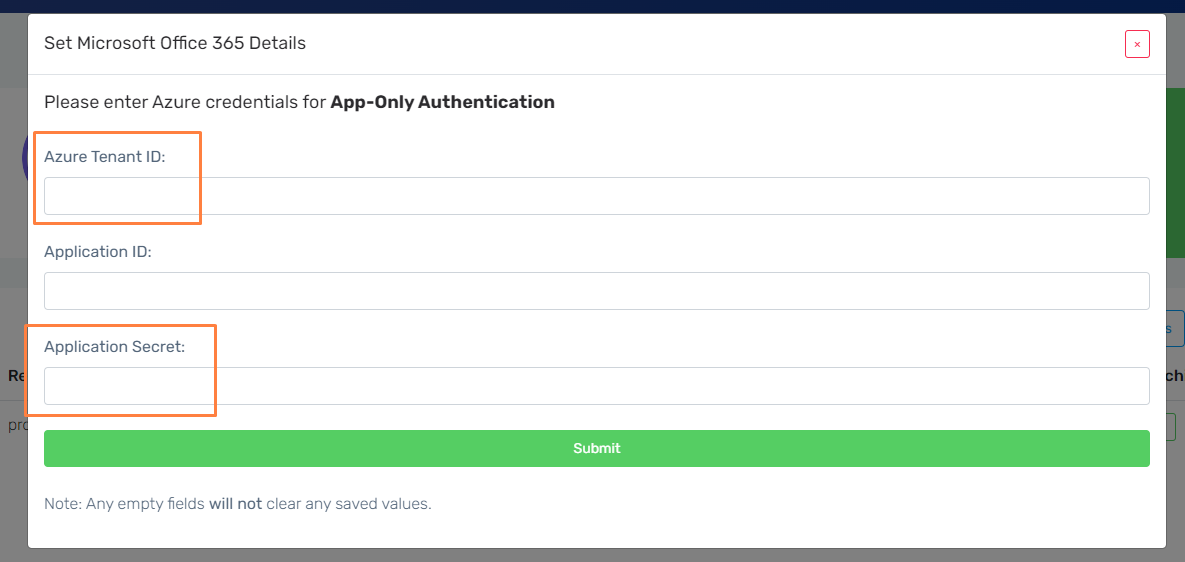
- In the 'Show Settings' tab, hit 'Advanced', and scroll down to the organization's 'Modern (App-Only)' button. Select this button and enter in your 'tenant ID' and 'Application secret' (any saved application ID will still be kept even if the 'Application ID' field is left empty when updating these values).

Please allow up to 2 hours for this to go through fully, whilst Hive's back-end syncs fully with Microsoft.