Seeding Veeam data using Veeam Agent for Windows can be timely depending on the size of the seeded data, and the location the data is being seeded to. Get in touch with Probax support to determine if this is the best option for you.
Customers without access to a USB device capable of holding the backup data will need to request a boomerang drive from the Probax team.
Getting started:
In order to get started, you will need to have a customer account, user and storage space set-up and ready to receive the backups you would like to be seeded. Once established, the process involves three main steps
- Deploy a backup job to a local repository
- Post the local backup job data to Probax
- Map the backup job to the cloud environment
Veeam's Knowledgebase article runs through the process of pushing a backup chain to the cloud repository through seeding in more detail. Within this article, Scenario 2 applies to most customer's backups on the cloud, wherein the methodology applied relies on Probax utilising a Scale-Out Backup Repository (SOBR).
1. Deploy a backup copy job to a local repository
For most customers, best practice is to create a new backup copy job, rather than editing a pre-existing job. To get started, head to our knowledgebase article with a video explaining the steps required. There are two main areas to look out for here:
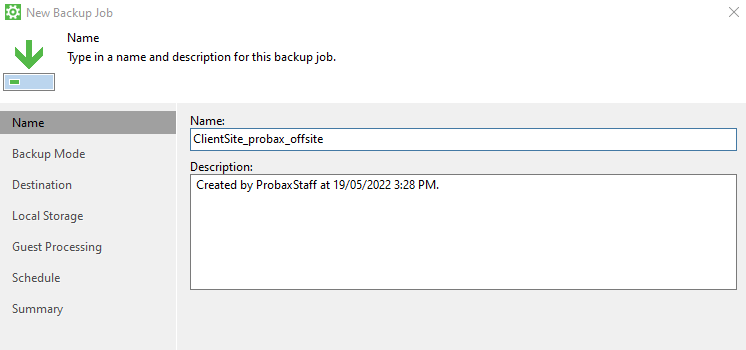
- Please create the job without any special characters within the job name, this includes spaces (" ") - Feel free to use underscores instead:
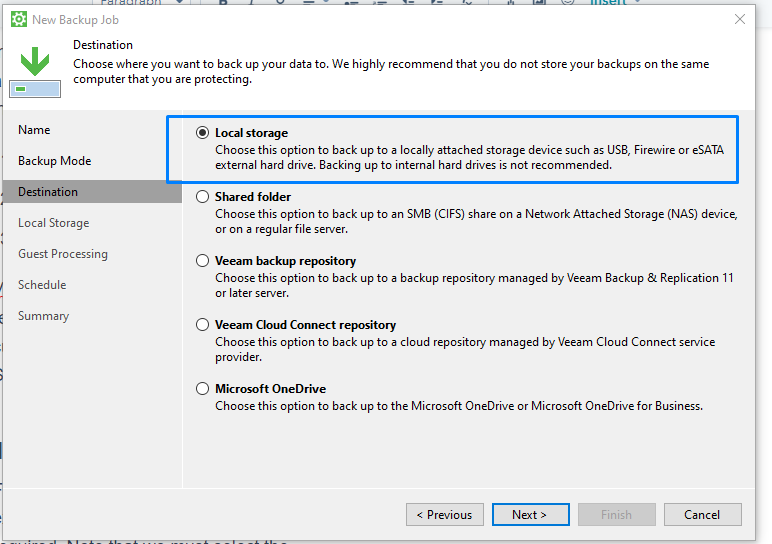
- Note that we must select the "Local Storage" option during this process:
Once deployed, your backup job will automatically process a full backup job to the locally attached storage. Once you have a full backup image created, please disable the local backup copy job.
It is critical this copy job does not process until the seed is fully complete.
2. Post the job to Probax
Once the backup has completed an active full, and you have ensured the job has been disabled, double check you can see all backup files are correctly placed on the USB device (at minimum, you should find a .vbk and .vbm file in the local repository, although any number of added .vib files can be added).
It's at this point that we need to verify the backup job folders/.vbm file contain no special characters including spaces. Veeam's KB describes this: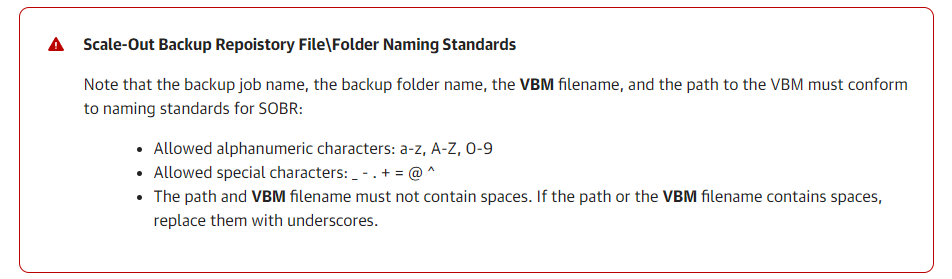
In the even the job name does contain spaces (" ") or special characters, please let the Probax team know to make the necessary adjustments on the cloud side.
Depending on how you decided to seed this backup, the drive will need to be shipped to a Probax location near to you:
- Customers utilising a Probax Boomerang can simply place the seeded drive in the provided pelican case, and straight into the postal box, being sure to tape up any openings ready for postage. Inside the original boomerang will be a return post sticker that you will need to stick to the exterior of the postage box.
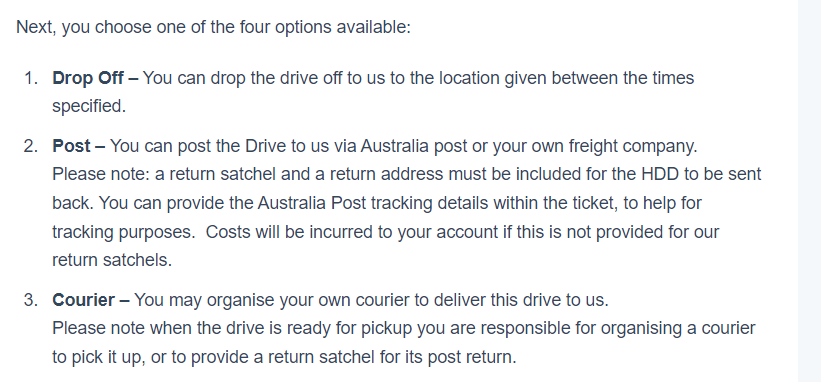
- Customers sending their own backup drive have the options outlined in our "How to: lodge a seed drive" KB :
Please shoot through any shipping details to the Probax team to ensure the fastest time to successful backups. The Probax support team will let you know once the drive is received and the data queued for seeding.
3. Map the backup job to the cloud environment
After sending the drive to Probax, the support team will upload your data to the cloud environment, and let you know when it is time to map the backup job to the cloud. It's important to wait until you have confirmation that the cloud environment is ready, and the Veeam Cloud Connect repository has been rescanned on the cloud console - Veeam Agent for Windows doesn't let you do this from the local console (Probax support will have performed this before asking you to map). To map your backup job:
- Head to your backup job that you created to seed the backup data, and click 'edit job'
- Head to the 'Destination' tab in the Backup job wizard, and select 'Veeam Cloud Connect repository
- Follow the next few tabs, entering in the DNS name of your storage space and the credentials of your tenancy.
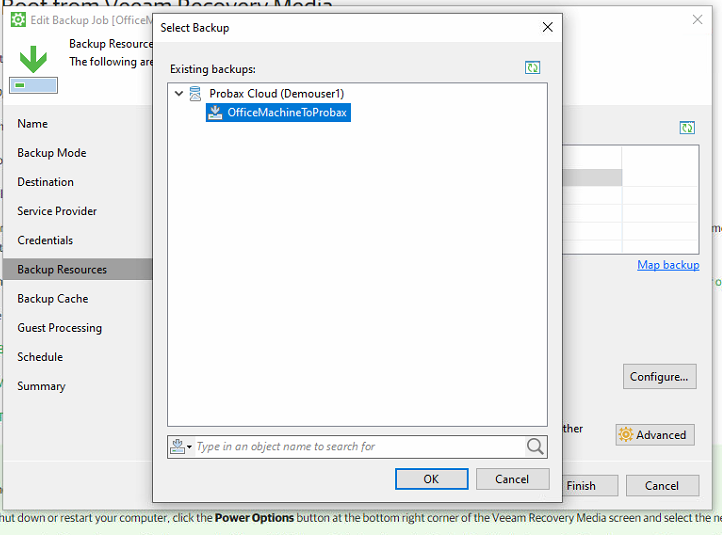
- In the 'Backup Resources' tab, find the repository for your cloud backups, and hit 'Map Backup'. Ensure here that you can see the backup job name correctly underneath the tenant
- Set your retention, and hit next through the job settings to activate the job.
Once this is done, monitor the next job run to ensure an incremental backup is going through. If and active full is being created, please cancel the job and email Probax support.