Before You Get Started
There are several requirements needed before you can setup your seed job.
- Create a Veeam Backup Job
This is for your local images. Veeam Backup Job data can not be used for the seed, it must be Backup Copy Job data. Please follow our KB Articles for Physical or Virtual environments. - Create a Local Seed Drive Repository
Follow our instructions on the KB Article How to: Create a Backup Repository using Veeam. In this scenario, you’d be adding the local hard drive as a Windows Server repository. - Lodge a Drive Seed in Probax Hive
Lodging a Seed Ticket is required for all drives being sent to Probax. A drive seed ticket is used for tracking purposes throughout the seeding process, as well as a reference in case you ever need to get in contact with the Probax team. Please follow the steps listed in How to: Lodge a Drive Seed article.
Create a Backup Copy Job to the Seed Drive
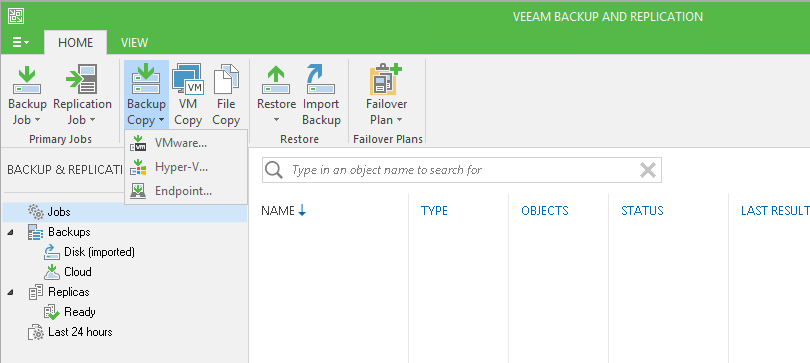
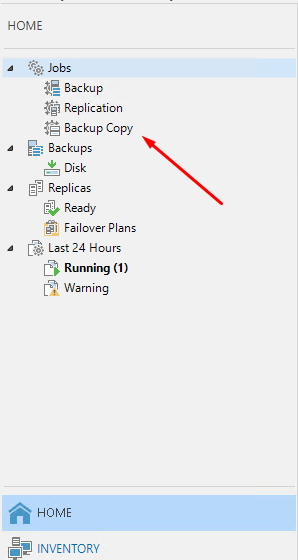
- In the Veeam Backup & Replication tab, under the “Home” ribbon, click the “Backup Copy” item and choose the backup copy job type that corresponds to your backup type:
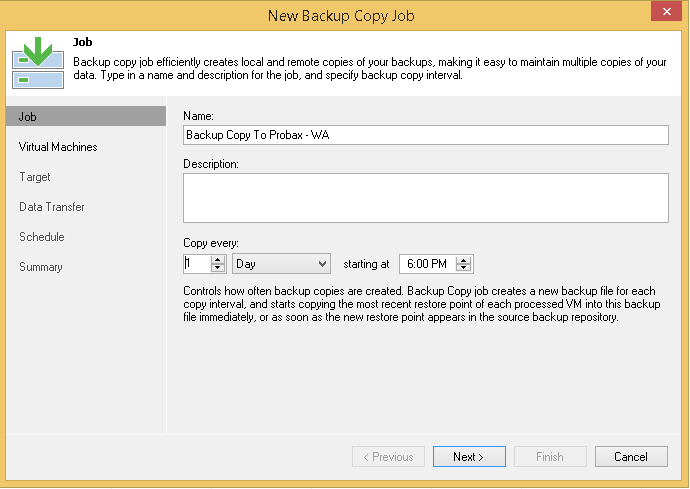
- Set the name of the job, the description, and the schedule, then click Next:
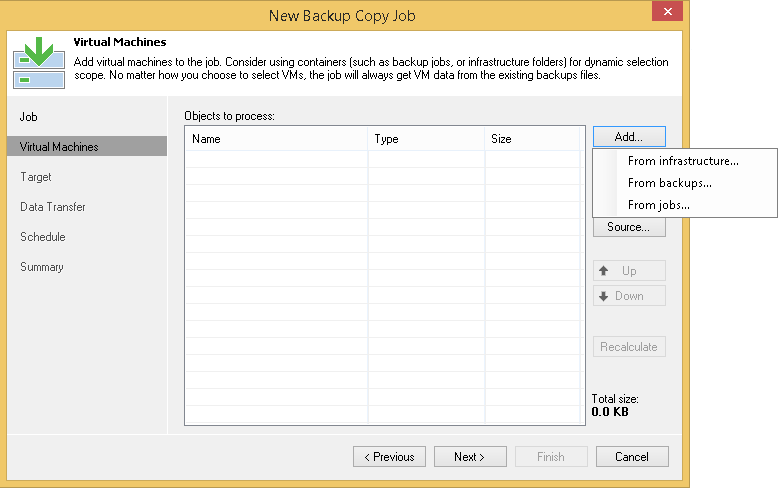
- Choose the machines to backup by clicking the “Add” button at the top right and selecting the machines from either infrastructure, backups, or jobs; then click Next:
- Select the repository that you created earlier as the Backup Repository from the drop-down list.
NOTE: Veeam may ask you how you would like to format the seed drive - Select NTFS as your formatting type for this.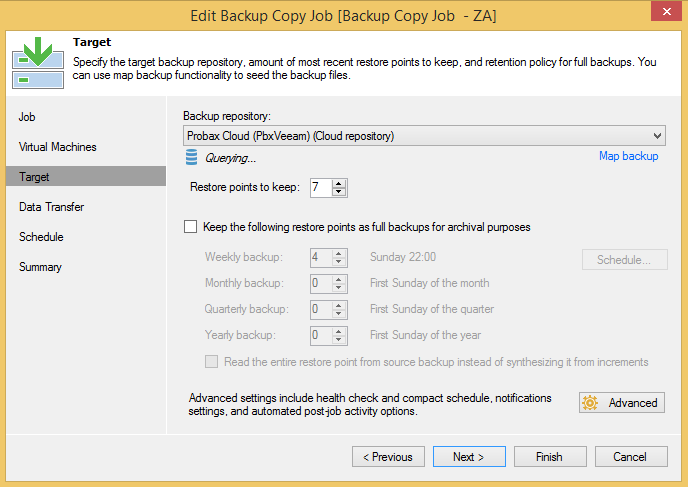
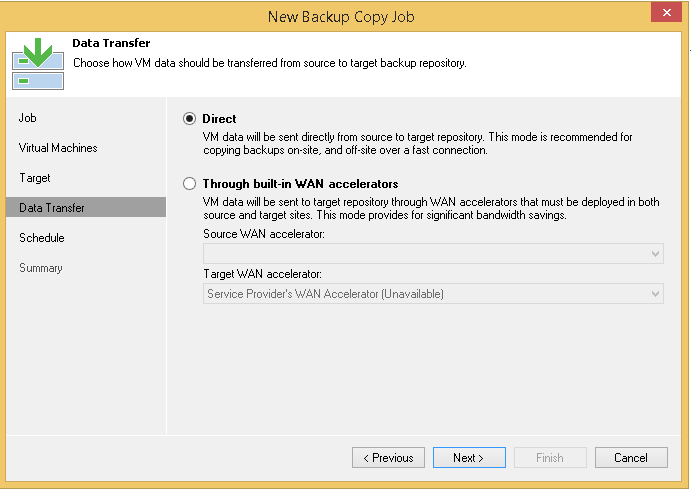
- On the Data Transfer window select the “Direct” option. Click Next.
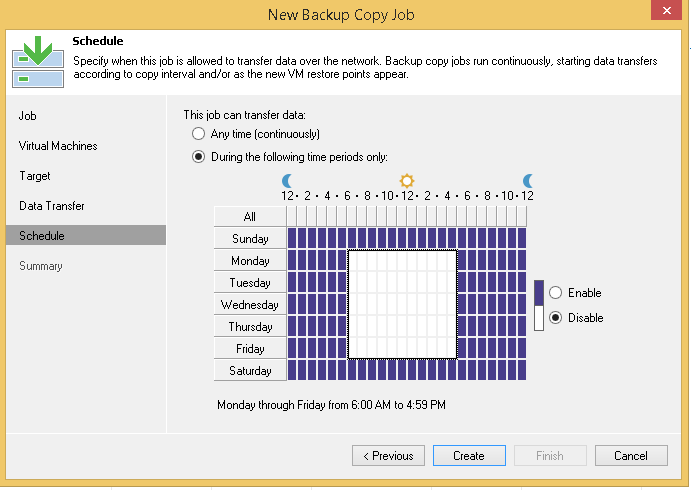
- To set schedules for when data is allowed to transfer over the network (to reduce loads during peak times), click the “Schedule” entry in the column of options at the left of the window. We recommend the below settings to stop transfers during business hours.
- Click Finish.
- Wait for your backup copy job to successfully complete, and ship the drive to Probax using the instructions listed in your lodged drive seed request.
NOTE: At this point, please disable the backup job you created, but do not delete it, as we will use it in the following steps to map to the seeded images.
Import Seeded Backup
Once the seed is complete, we will notify you by email. From there, further action is required on the client-side to complete the seed.
- In the Veeam Backup & Replication console, open the Backup Infrastructure view.
- In the inventory pane, click Backup Repositories.
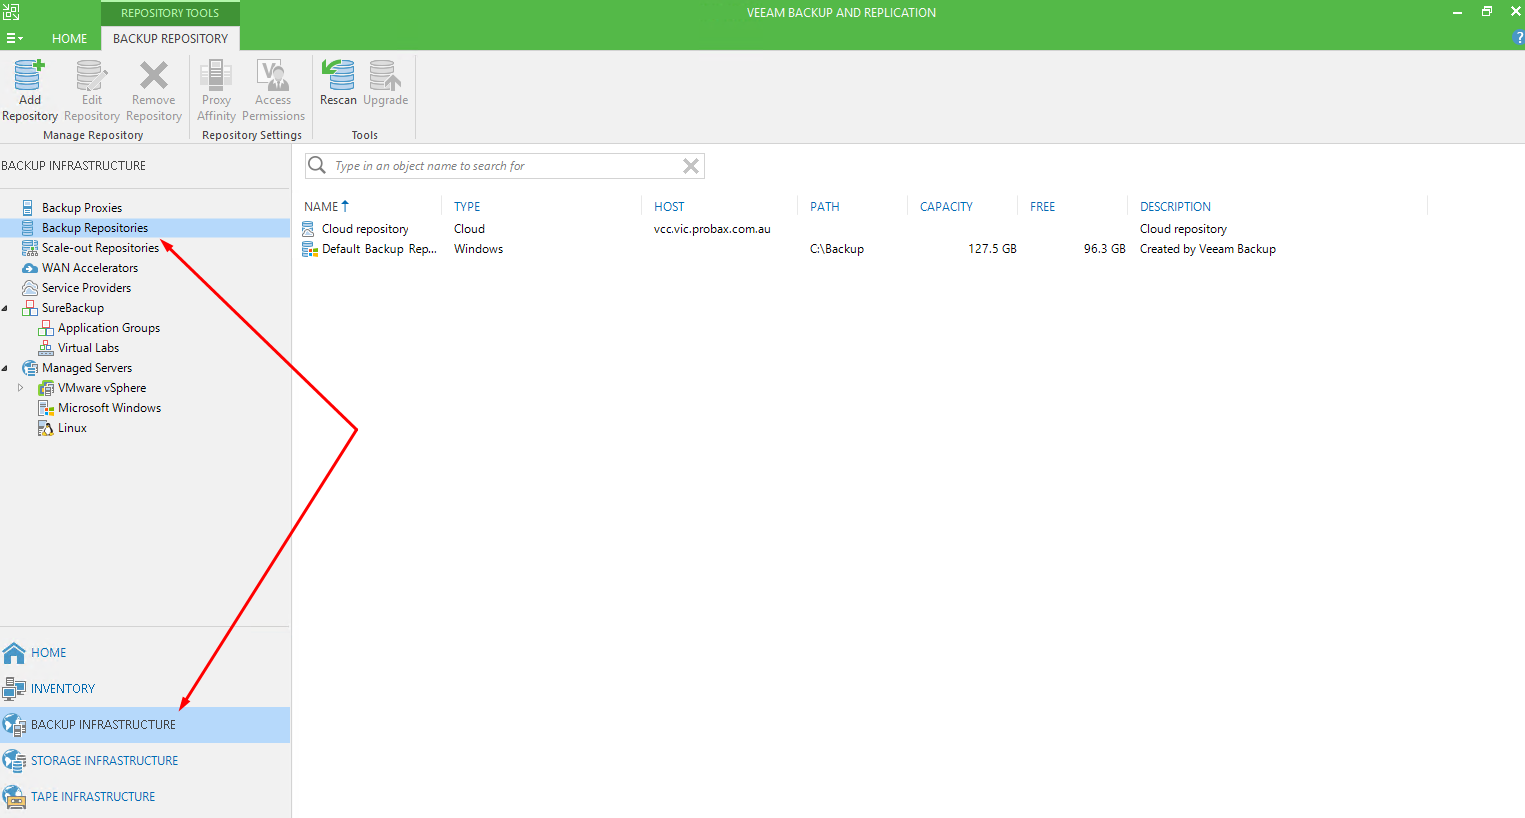
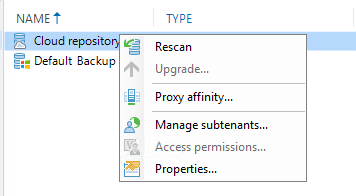
- Right-click the backup repository and select Rescan.
- Open the Backup & Replication Home view.
- In the Home pane, click Backup Copy underneath Jobs.
- Right-click the original backup copy job and select Edit.
- At Target step of the wizard, select the new cloud repository from the Backup repository list.
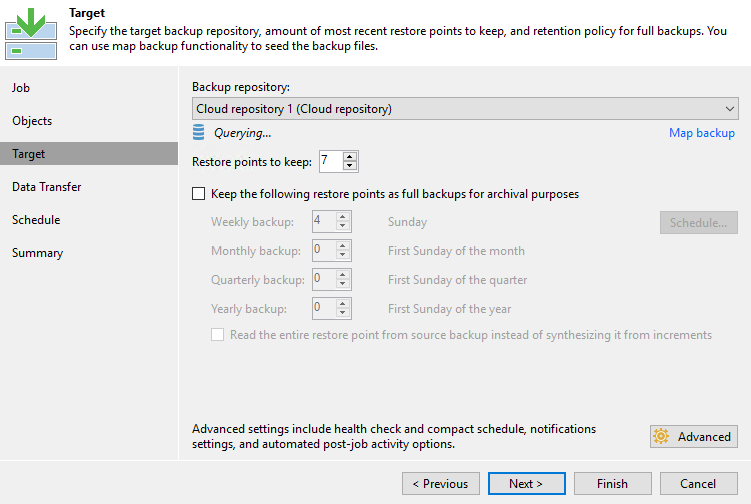
- Click Map backup.
- In the Select Backup window, choose the backup job and click OK.
- Save the job settings.