In order to seed your data for ShadowProtect, simply:

- Follow the steps for either How to: Create a ShadowProtect Backup v5 or How to: Create a ShadowProtect SPX Backup.
- Allow ShadowProtect to create its first set of images. You'll need at least a base image in order to seed the data - Please ensure that your backup job is set to Continuous.
- Copy and paste these images onto an external hard drive or NAS.
- Create a Probax Seed Drive ticket via Hive so that we can track and monitor this seed and communicate on the progress. To perform this, open the account in Hive and click on the "Manage Storage Spaces".
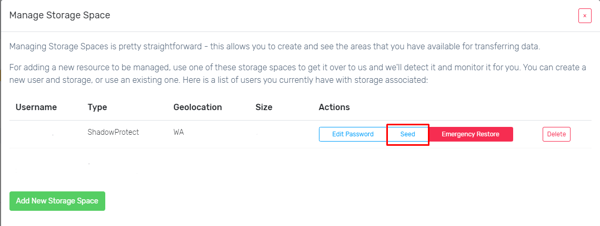
- Select the Seed button and follow the prompts.
- Send the external hard drive containing the data to Probax for us to import to the cloud.
- Follow the steps in How to: Replicate using ImageManager for this client to manage this folder. Adjust the replication settings to not send the base images, but to send the incrementals immediately.
Verification
Once received, Probax will upload the seed drive as-is. In order to ensure the integrity of the data before it is sent to Probax, you will need to perform a verification check on the seed drive using ImageManager.
This typically takes 1 day per TB.