Veeam Agent + Veeam Backup & Replication
Veeam creates physical backups by deploying Windows Agents to the sites that are being backed up. The deployment of Windows Agents, licensing of Windows Agents and management of Windows Agents can be performed through Veeam Backup and Replication (B&R).
Veeam B&R will connect to the computers on your network using administrative credentials and install Veeam Agent for Windows Lite. Veeam's Agent for Windows Lite will perform local backups of the system and push the data a local backup data repository. Veeam B&R can push this backup repository data to the cloud, allowing you to have both on and offsite backups.
This guide assumes that you have previously followed our How to: Create a Backup Repository using Veeam guide. If you have not, please follow the steps within that guide to creating a backup repository, as it is essential and required for the Veeam physical backups to be created.
To create your backup:
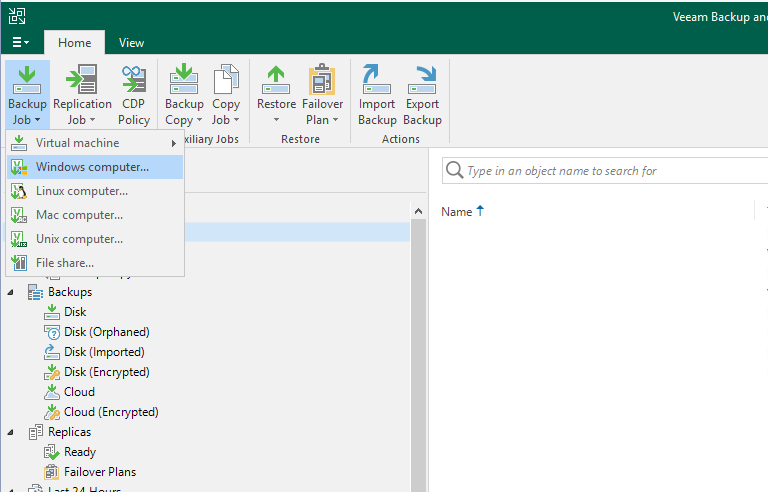
- Click on the Home tab, followed by Backup Job. From the drop-down menu, select Windows Computer. This will open the Windows Job Creation Wizard.
- Choose the type of type of Agent license that you require to backup. The two options are:
Workstation – For office or home computers and laptops.
Server – For machines that typically remain directly connected to the local backup server. Recommended for any physical machines requiring application awareness, such as SQL servers, Exchange servers and hosts.
Note: Customer's will need to review the license they used to license Veeam Backup and Replication to perform some of this functionality. More information in our Knowledge Base.
For host backups (as in our example), please select 'Managed by backup Server'.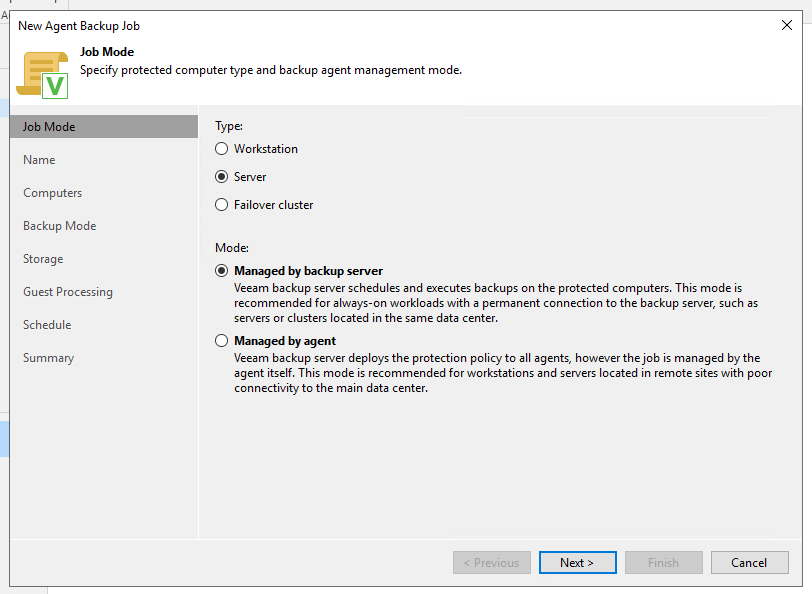
- Set a name specific to the job's task - In our case, we will name our job 'Bobs_printing_host_to_Probax_cloud'
- Click to add any local machines to your network that you would like to add. As a demonstration, we’ll be backing up localhost with 127.0.0.1. You’ll also be asked to add credentials to the machines. These credentials need to an administrative credential so that Veeam Agent has permission to deploy and execute:

- Choose how you would like to backup the workstations or servers. Best practice here is to backup with the 'Entire computer' mode selected.
- For the destination under the 'Storage' tab, choose the repository you would like to send your backups to. Customer's looking to send backups to the Probax Cloud will need to set up a storage space in Hive.
- For more options in the 'Storage' tab, please review our 'Veeam best practice guide'
- Select the schedule for how often you would like Veeam Agent to perform the backup. It is recommended to set this to at least daily.
- Review the settings and apply!
Once the job has been created, it will start automatically. You’ll be able to see if the job had any issues executing by clicking on the “History” tab on the bottom left. Any failed jobs will be marked with a red “X”, which you can click on for more information.
For technical support questions, please contact support@probax.io
For sales and product information, contact your Partner Manager.