How to: Create a Backup Copy Job using Veeam B&R
Learn how to create a Veeam backup copy job and send your backups to the Probax Cloud
To create a backup copy job, you need to follow four steps:
-
Create a Local Backup Repository (where local images are stored)
-
Create a Cloud Service Provider (where cloud images are stored)
-
Create a Backup Job (local)
-
Create a Backup Copy Job (cloud)
Creating a Local Backup Repository
- Follow our Knowledge Base article How to: Create a Backup Repository using Veeam
Creating a Cloud Service Provider
- Follow our Knowledge Base article How to: Create a Service Provider using Veeam
Creating a Backup Job
Please follow our Knowledge Base articles:
- How to: Create a Virtual Machine Backup using Veeam
- How to: Create a Physical Machine Backup using Veeam
Create a Backup Copy Job
A backup copy job will send your local backups to Probax. In order to create a backup copy job, all previous steps in the setup need to be completed.
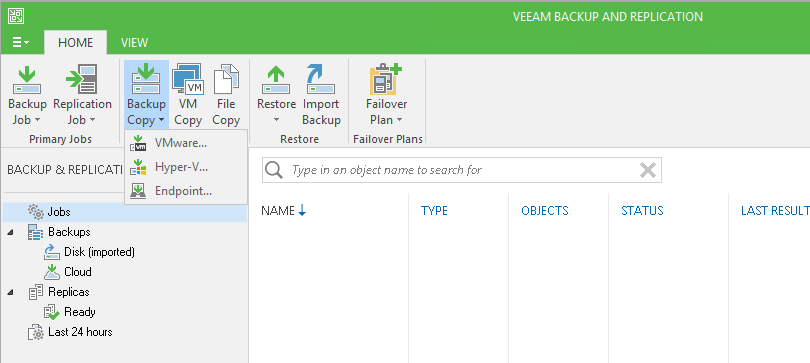
- In the Veeam Backup & Replication tab, under the "Home" ribbon, click the "Backup Copy" item and choose the backup copy job type that corresponds to your backup type:
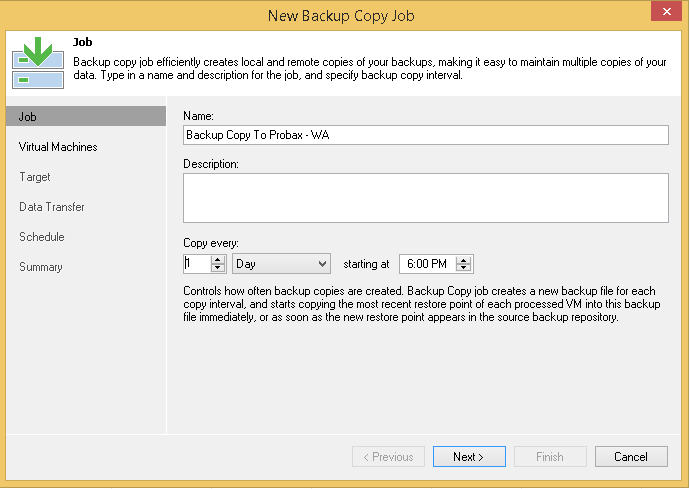
- Set the name of the job, the description, and the schedule, then click Next:
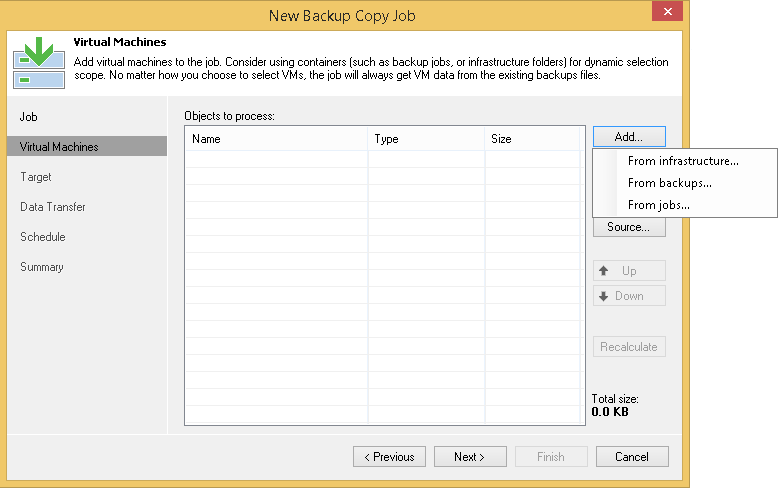
- Choose the machines to backup by clicking the "Add" button at the top right and selecting the machines from either infrastructure, backups, or jobs; then click Next:
- Select the repository that you created earlier as the Backup Repository from the drop-down list. Specify the number of restore points to keep as well as any weekly, monthly, quarterly, and/or annual backups (which can be stored in Honeycomb Cold Storage for long-term data retention).
If you want to send your data to us to seed with an external hard drive, here you must choose your external drive as the repository (you may need to set this up in your Backup Repositories). Click OK, then Next.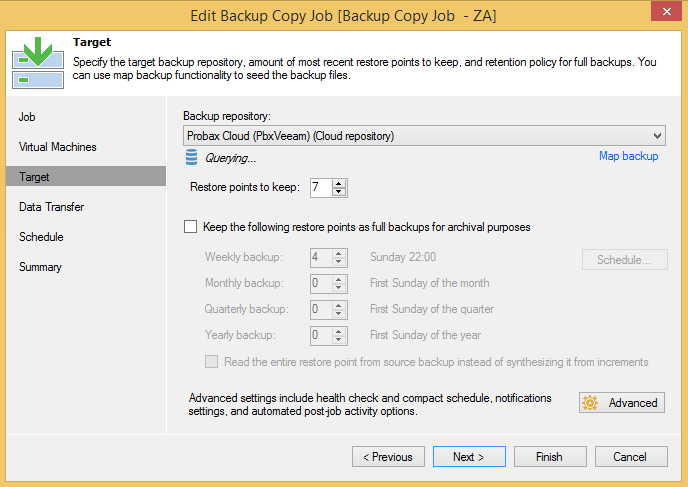
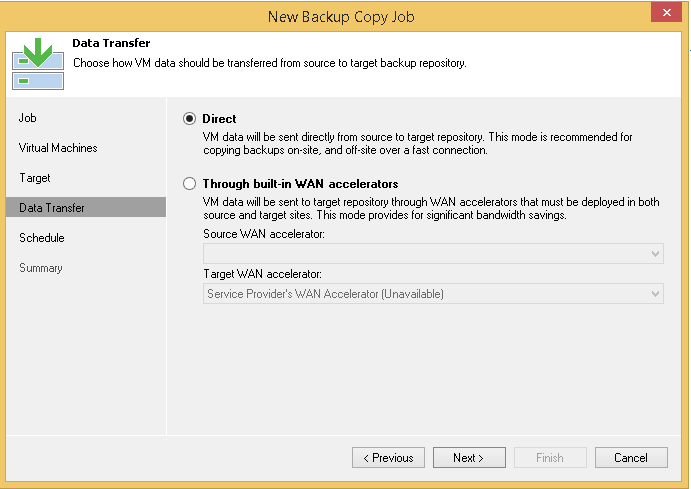
- On the Data Transfer window select the "Direct" option. Click Next.
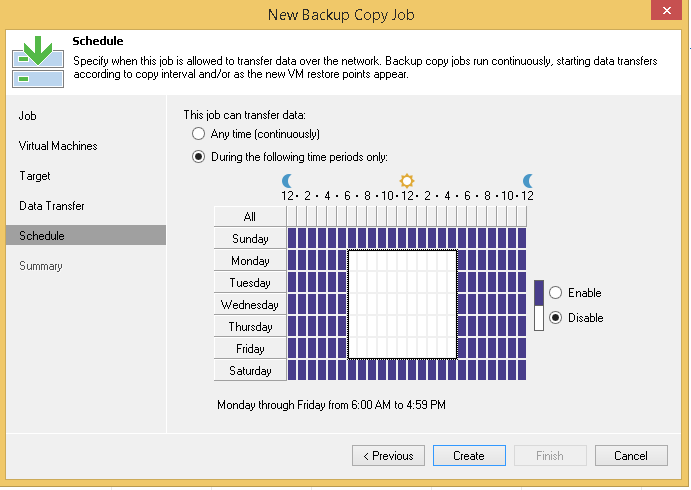
- To set schedules for when data is allowed to transfer over the network (to reduce loads during peak times), click the "Schedule" entry in the column of options at the left of the window. We recommend the below settings to stop transfers during business hours.
- Click Finish.
Congratulations - you're all done! Now you'll be sending your incremental backups across to us while we do the processing on our side.
For example, if you choose to keep 7 incrementals on our side, then after we receive the 8th incremental image the first incremental gets merged into the base image file. This processing is automated on Probax's side. This means that, although the base file has been modified, you don't need to send it from the local side.
For retaining incrementals for longer periods of time, you have the option to increase the number of incrementals that we keep on our side. This can be modified in the Veeam Backup and Replication Console. Alternatively, you have the option to enable GFS on the Veeam client and enable Honeycomb Cold Storage on Probax Hive to retain long term restore points.
To read more about Forever Forward Incremental, see these Veeam Knowledge Base articles:
- https://helpcenter.veeam.com/backup/vsphere/backup_copy_simple_retention.html
- https://helpcenter.veeam.com/backup/vsphere/backup_copy_gfs.html
- https://helpcenter.veeam.com/backup/hyperv/backup_copy_simple_retention.html
- https://helpcenter.veeam.com/backup/hyperv/backup_copy_gfs.html
For technical support questions, please contact support@probax.io
For sales and product information, contact your Partner Manager.
