Adding a Probax Scout created Wasabi Bucket to VBR:
- Before adding the Wasabi Bucket to VBR, we will need to find the Access and Secret key for your Wasabi Bucket.
- To find the required keys, log into MSP Backup and access the desired backup account. Select the kebab menu (three vertical dots), then Configure Protection:

- In the View Scout window, select Retrieve Recovery Details:

- Enter your Authenticator code, then Submit:

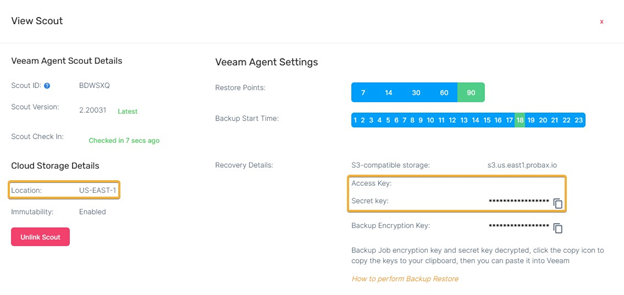
- With the Recovery Details revealed, copy the Location, Access and Secret Key as we’ll need to add these to VBR later:
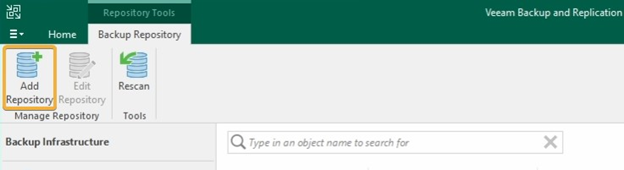
- On your server, launch VBR and ensure Backup Infrastructure is selected in the working area:

- In the Ribbon, select Add Repository:
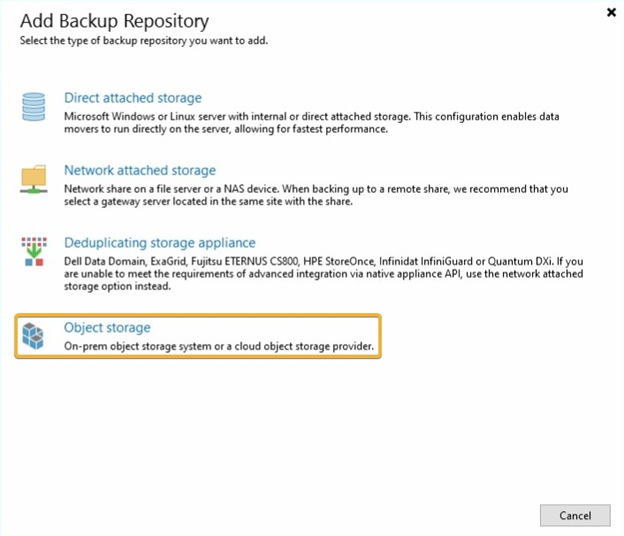
- At the Add Backup Repository window, select Object Storage:
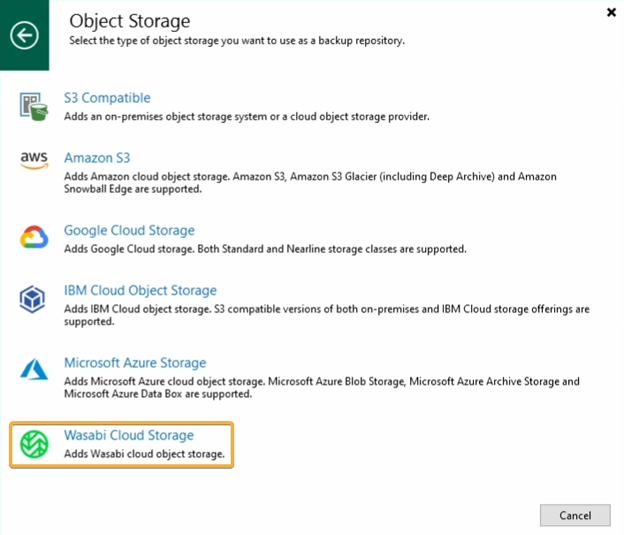
- In the Object Storage window, select Wasabi Cloud Storage:
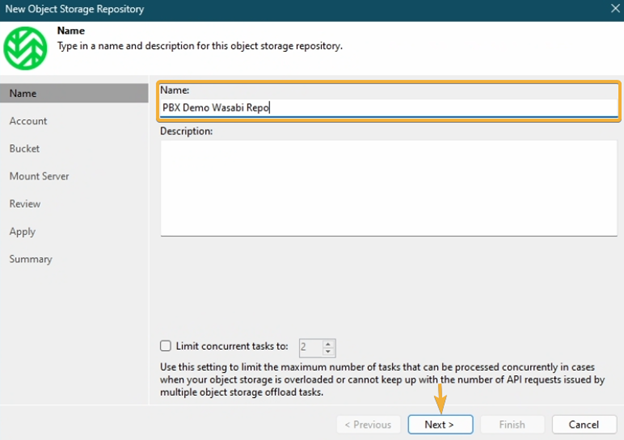
- The New Object Storage Repository window will open at the Name step. Choose a name for the repository, then select Next:
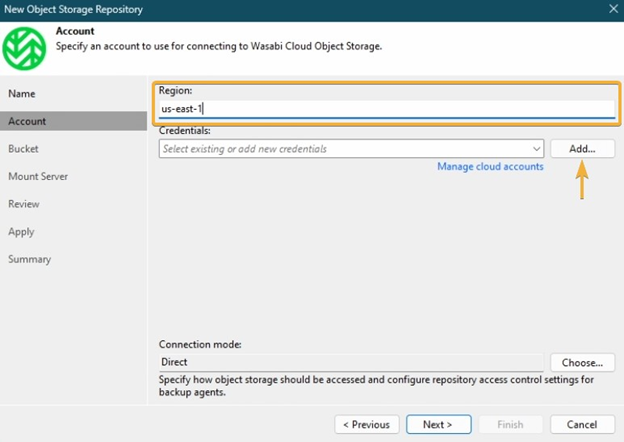
- In the Account step, ensure the Region matches the Location we copied in Step 5. Then select Add next to Credentials:
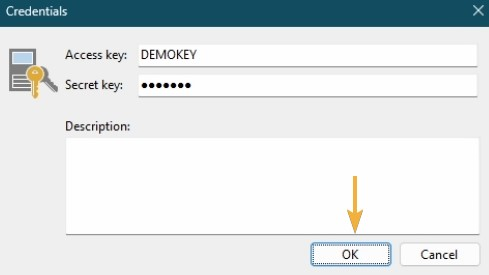
- In the Credentials window, add the Access and Secret key we copied from Step 5, then select OK:
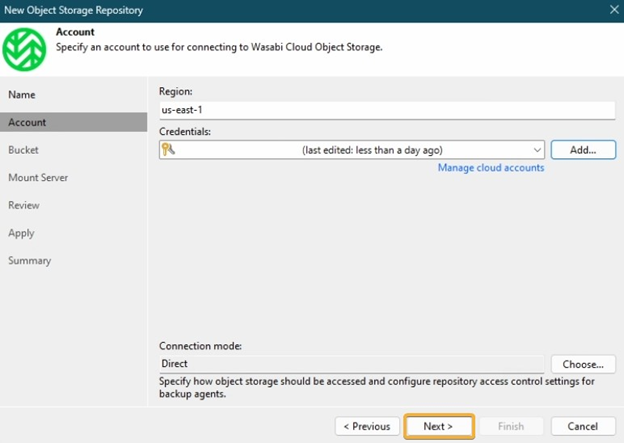
- With the credentials added, select Next:
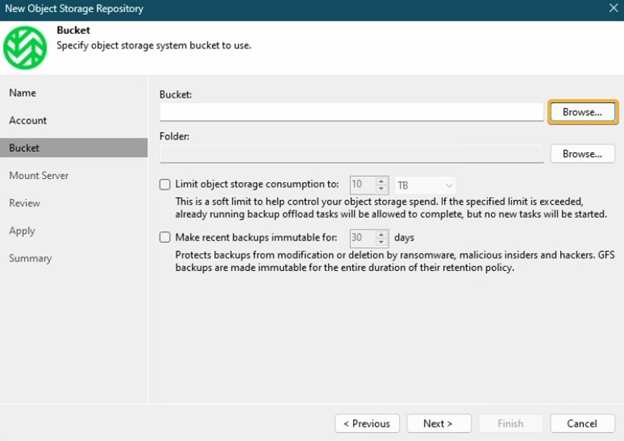
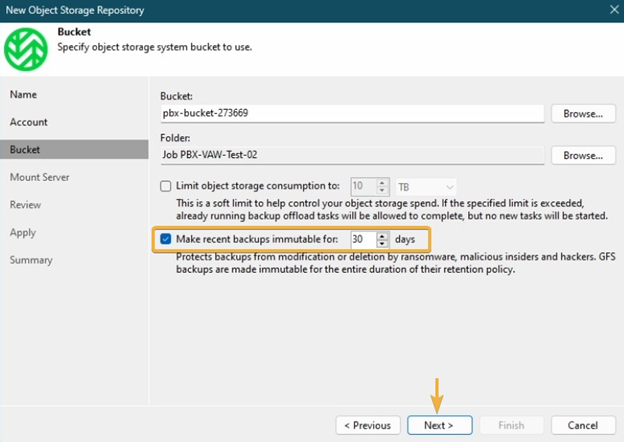
- At the Bucket step, select Browse beside the Bucket:
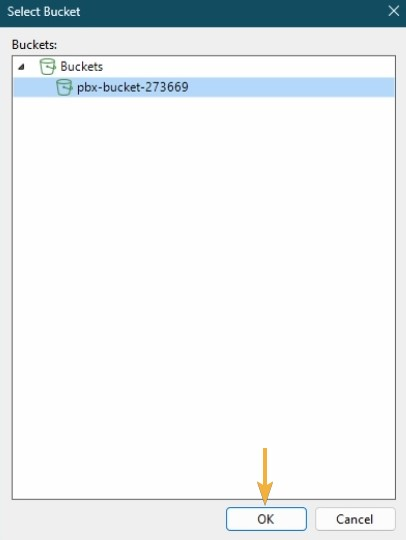
- In the Select Bucket window, choose your Bucket then select OK:
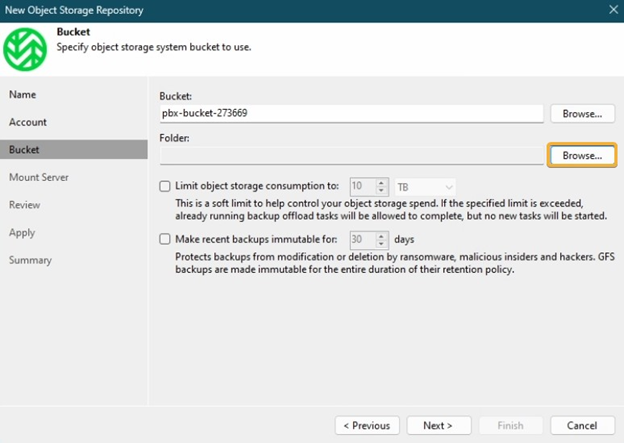
- Next, select Browse next to Folder:
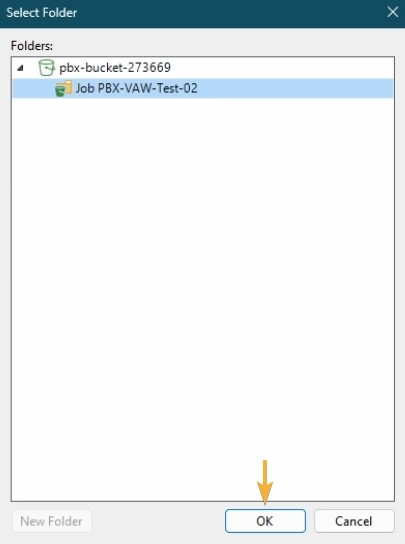
- In the Select Folder window, select your folder then OK:
- Ensure Make recent backups immutable for 30 days is checked, then select Next:
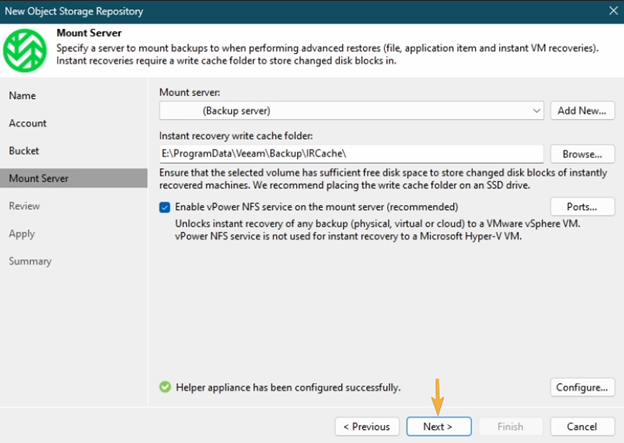
- At the Mount Server step, we’ll accept the defaults and select Next:
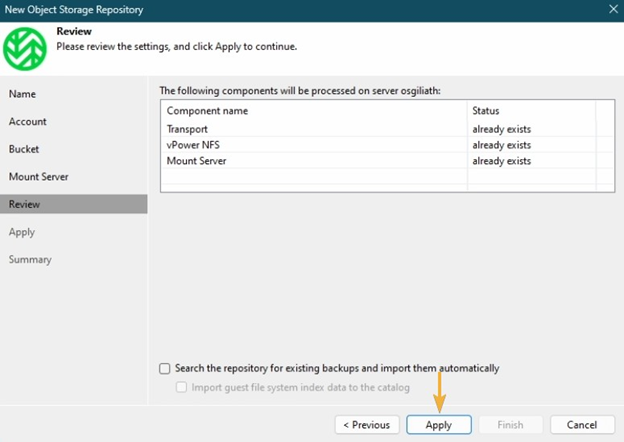
- In the Review step, we’ll accept the defaults and select Apply:
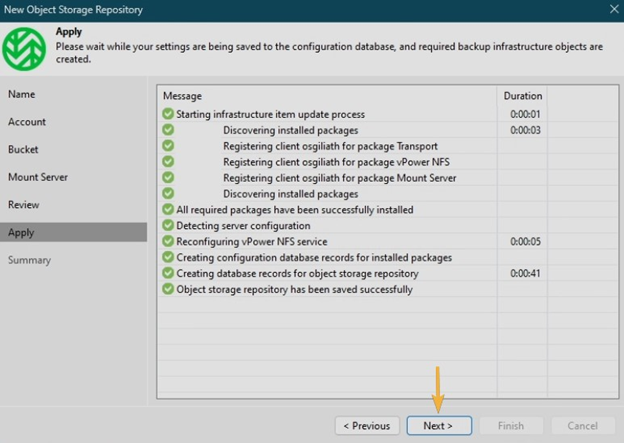
- At the Apply step, allow for Veeam to update the Transport, vPower NFS, and Mount Server components, then select Next:
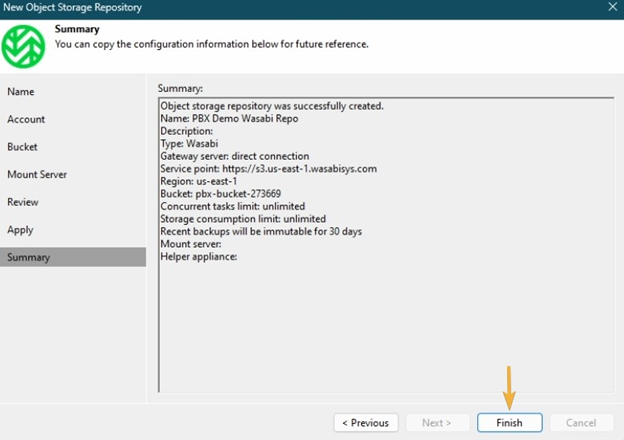
- Finally, at the Summary step, confirm the repository settings, then select Finish:
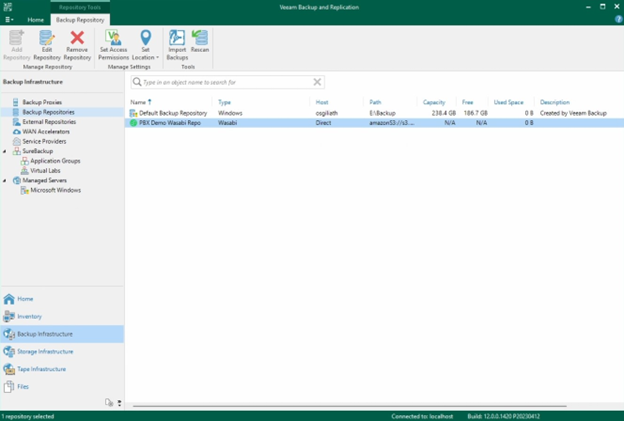
- Back to the VBR working area, you will now see the newly added Wasabi Repository:
With this guide, you will have learned how to add a Wasabi Object Storage bucket created by Scout as a repository in Veeam Backup and Replication. To restore data from this bucket, please review our KB, "How To: Restore Data using Veeam Backup and Replication (VBR)."